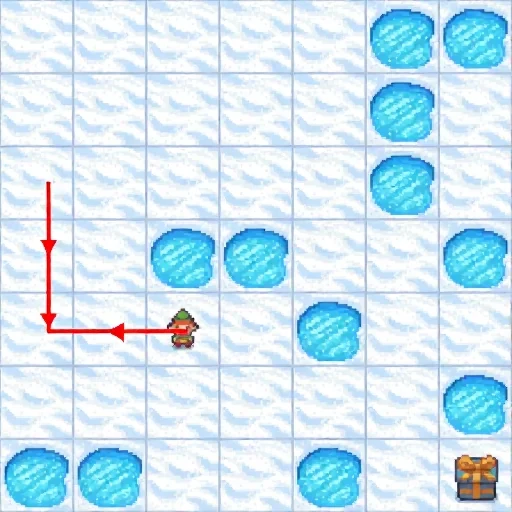
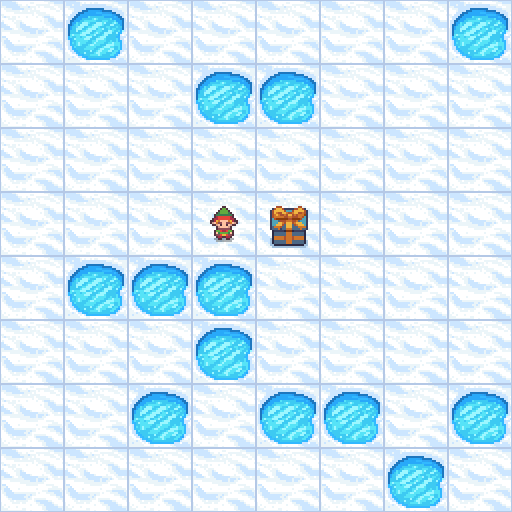
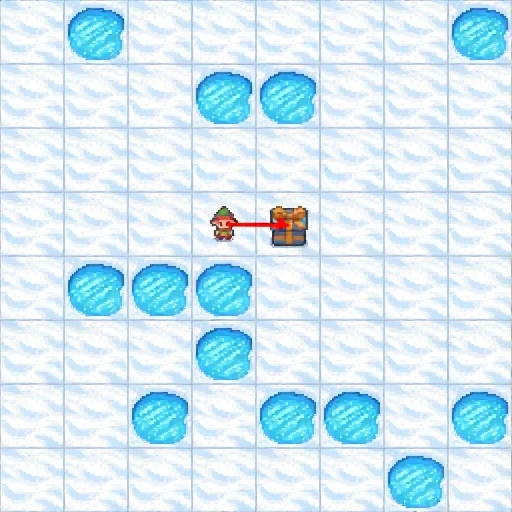
← ThinkMorph experiment index

Does ThinkMorph use its visual thought?

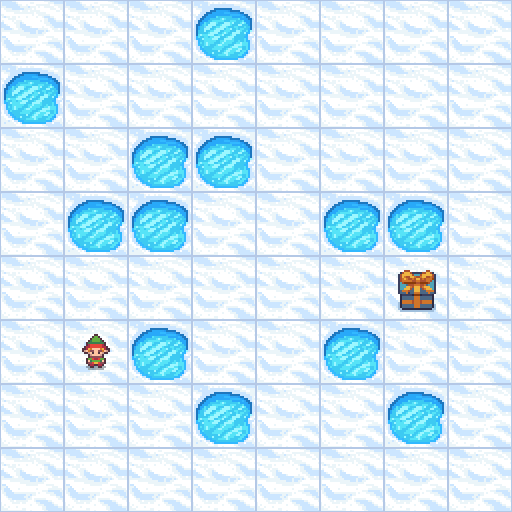
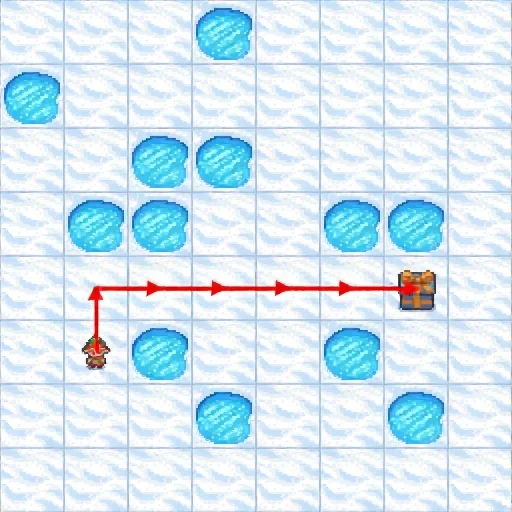
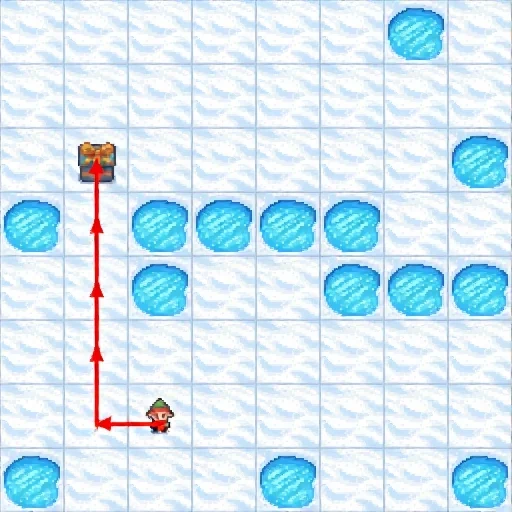
A pixel-level causal intervention on the same 18 balanced VSP cases (3 examples at each maze size, 3×3–8×8). Every condition receives the identical interleaved prompt and the identical model-generated text through <image_start>. We change only the image inserted into BAGEL’s VAE+ViT context before greedily decoding the final continuation. matched_wrong uses another ThinkMorph-generated thought from the same maze size whose decoded path is invalid for the recipient.

Run status: complete · 18 unique cases · checkpoint /mnt/lustre/work/oh/owl661/thinkmorph-reproduction/models/ThinkMorph-7B.

55.6%self-thought accuracy
16.7%wrong-swap accuracy
72.2%answers changed
72.2%follow donor's first move
33.3%copy exact donor path
7/10correct self → wrong swap

Aggregate causal results

InterventionNValid-path accuracyParse rateSame answer as selfExact donor pathDonor first move
self1855.6%100.0%100.0%——
matched_wrong1816.7%94.4%27.8%33.3%72.2%
blank1844.4%100.0%38.9%——
noise1833.3%94.4%33.3%——
omit1827.8%94.4%27.8%——

Grounded reading: the generated image is not universally decorative: a wrong matched thought changes 13/18 answers, aligns the first move with the donor in 13/18, and copies the exact donor path in 6/18. But this is not evidence of a trustworthy visual computation. The intervention destroys 7/10 otherwise-correct self answers and rescues 0/8 incorrect self answers. Easy cases can remain completely invariant; harder cases often follow or are destabilized by misleading pixels.

Replay caveat: self re-encodes the saved quality-86 WebP produced by the earlier run, whereas the original generation re-encoded its in-memory image. That small round-trip changes one replayed continuation, so all causal claims use paired replayed conditions only. Every condition otherwise has the same prefix reconstruction, greedy decoder, and VAE+ViT insertion path.

All qualitative interventions and raw continuations

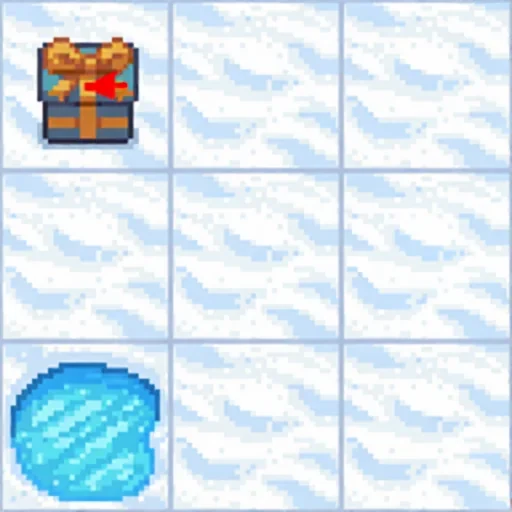
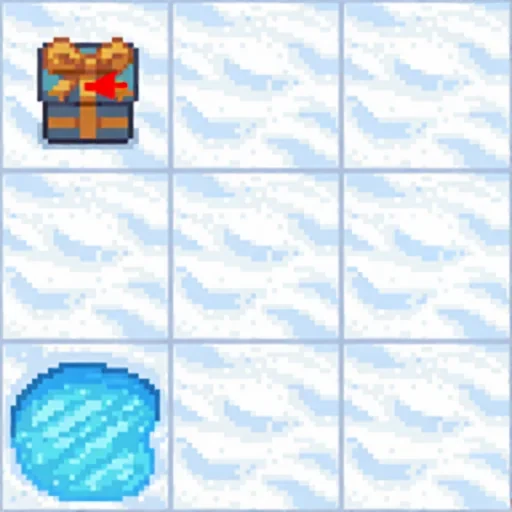
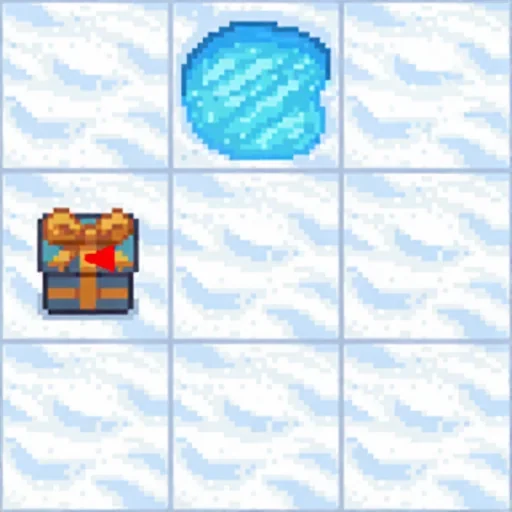
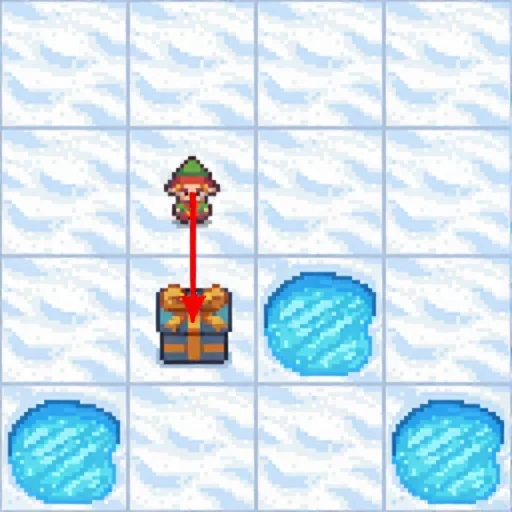
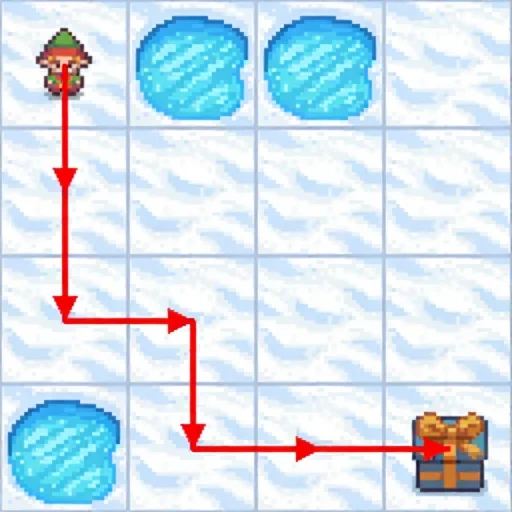
frozenlake_s3_0 · 3×3 swap stable
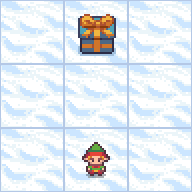
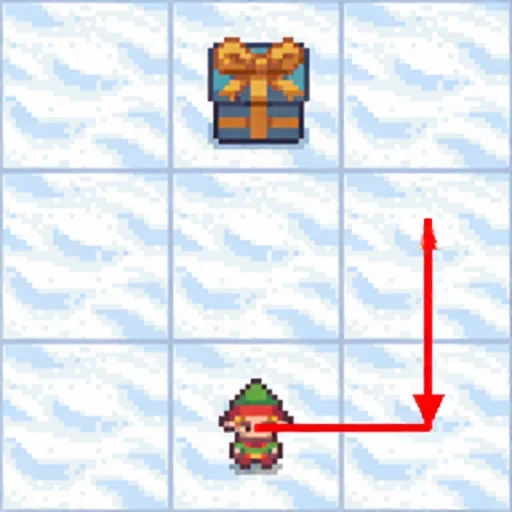
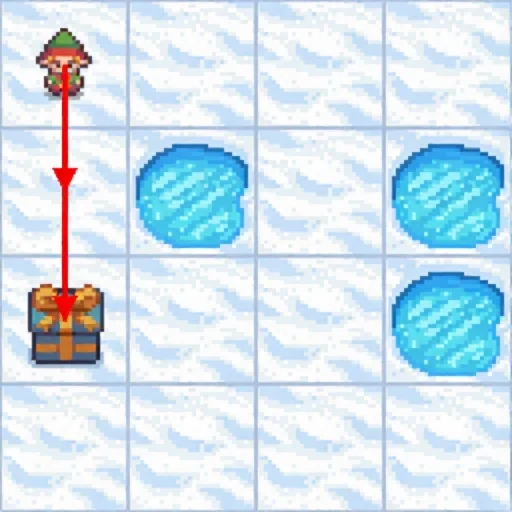
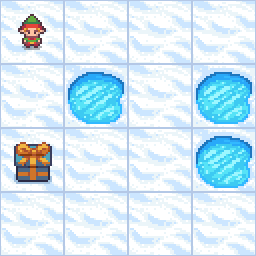
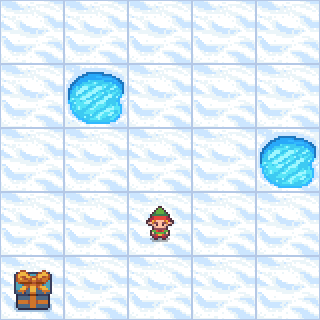
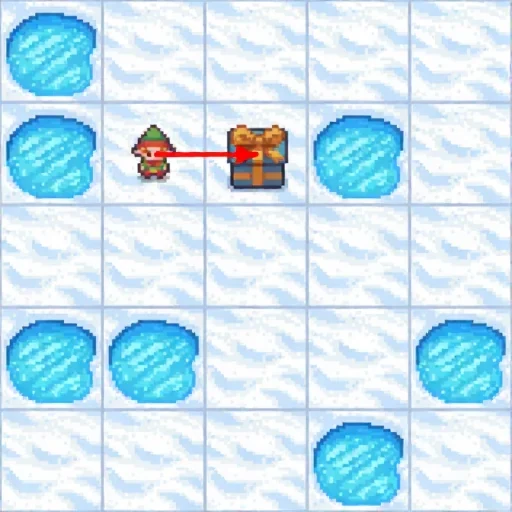
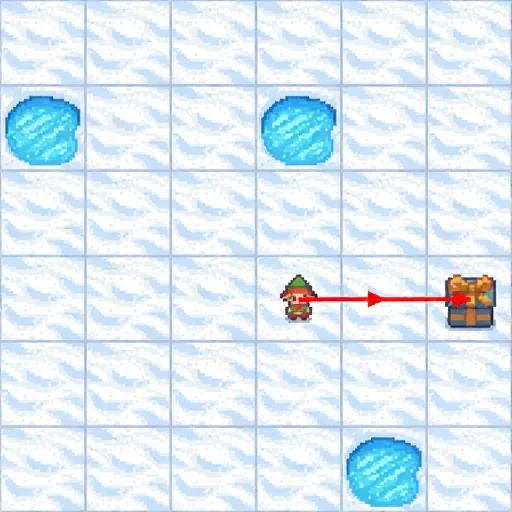
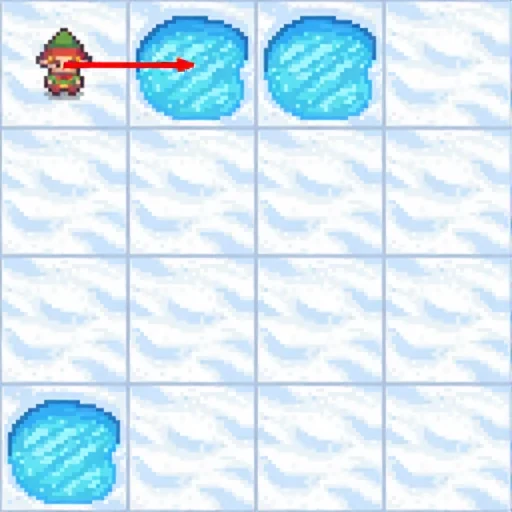
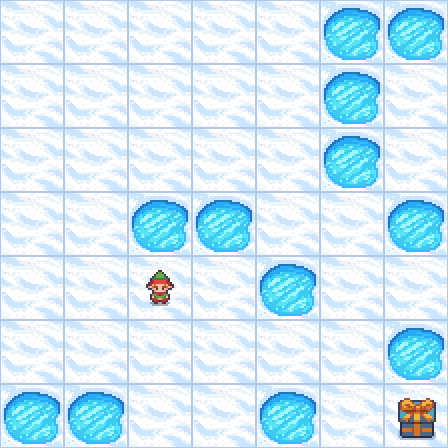
Recipient test maze
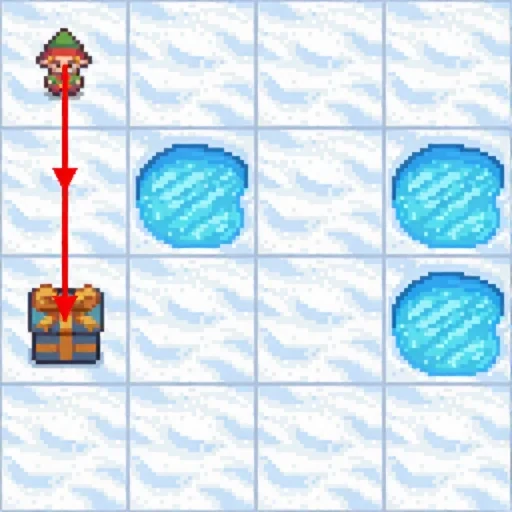
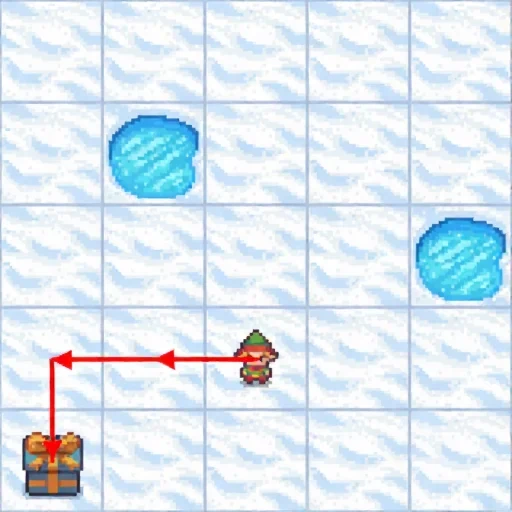
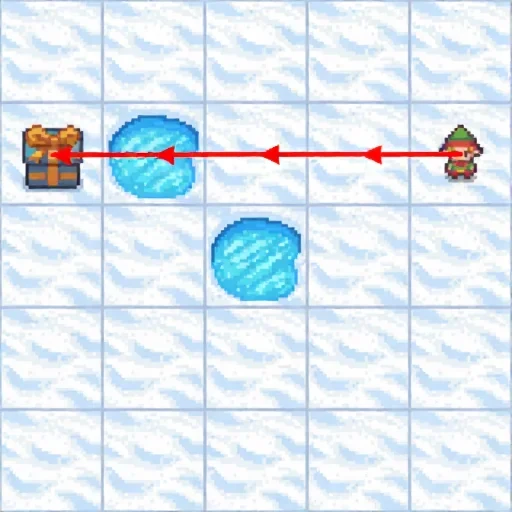
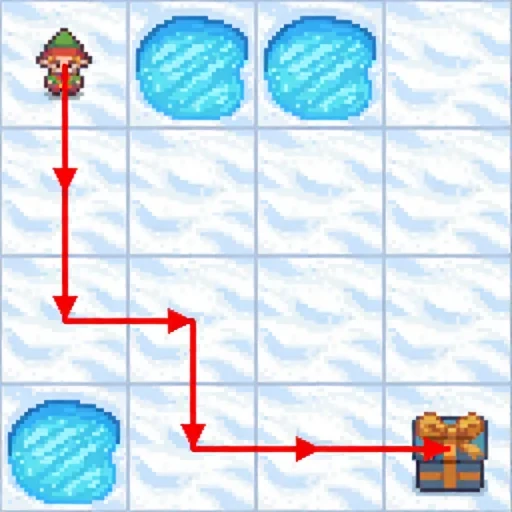
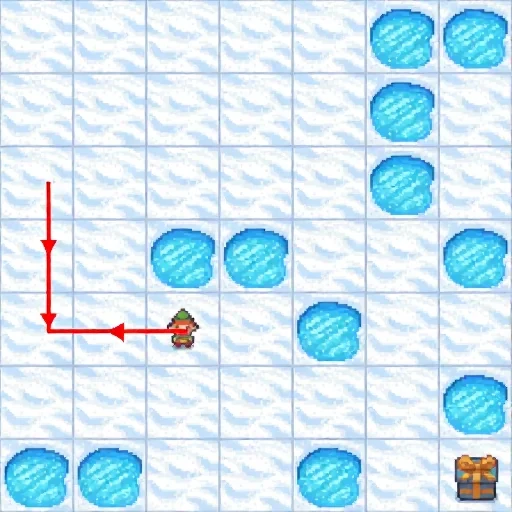
Original generated thought
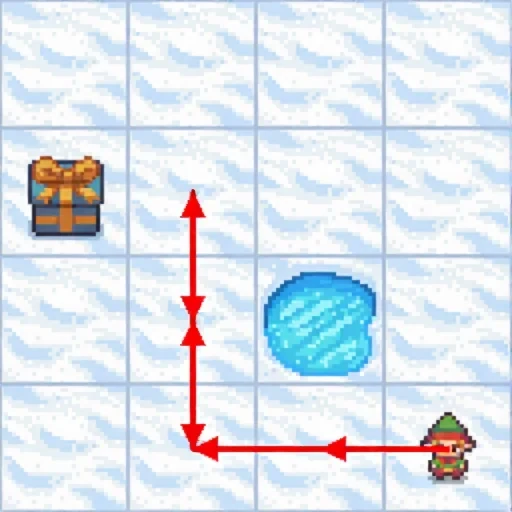
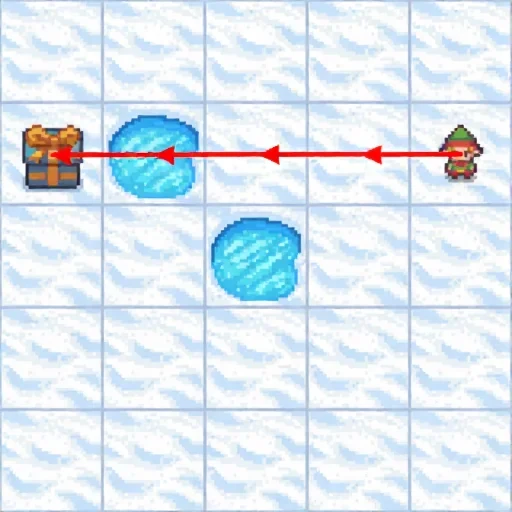
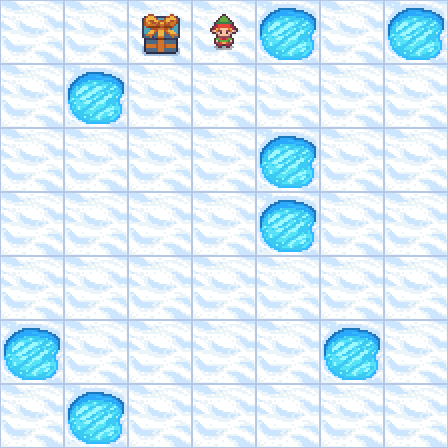
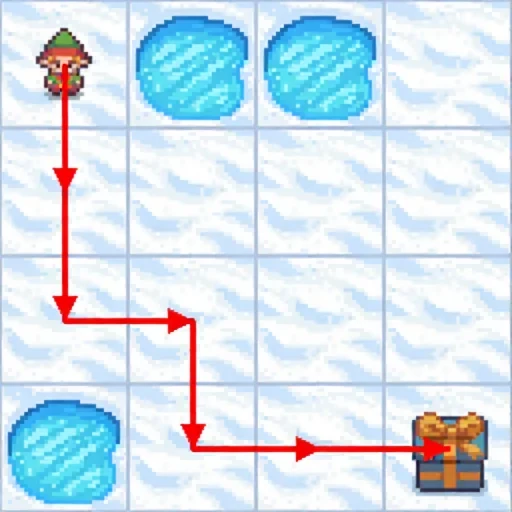
Wrong matched donor: frozenlake_s3_99 · donor answer L,U,L
Identical model-generated prefix before every intervention
<think>To solve the maze, I first interpret the layout. The player starts at the bottom row, second column (Row 3, Column 2). The goal is at the top row, second column (Row 1, Column 2). There are no holes in the immediate vicinity; the only hole is on the left side of the bottom row, but the player starts in the middle. All other squares are safe.

With this setup in mind, I proceed to plot the safest route. The player should move upward from the starting position to reach the goal directly. The first move is 'U', which brings the player to Row 2, Column 2—a safe land. The next move is another 'U', placing the player at Row 1, Column 2, which is the goal. Both moves avoid holes and safely guide the player to the goal.

Thus, the correct action plan is \boxed{U,U}.</think><image_start>

self

Answer: U,U · correct

Raw post-image continuation
<image_end><think>To verify the solution, I visualize the red path drawn on the maze. The player starts at the bottom row, second column. The first move 'D' would typically go down, but since the player is already at the bottom row, that move would have no effect and leave the player in the same spot. The next move 'U' moves the player up to the second row, second column, which is a safe land. Another 'U' moves the player up to the top row, second column, landing exactly on the goal.

The path shown in red never crosses any holes and directly reaches the goal in two upward moves. This matches the safest and shortest route derived earlier.

Therefore, the solution path is correct and can be written as \boxed{U,U}.</think><answer>\boxed{U,U}</answer>

matched_wrong

Answer: U,U · correct · exact donor: no · donor first move: no

Raw post-image continuation
<image_end><think>To verify the solution, I visualize the path step by step. The player starts at the bottom row, second column. The first move is upward, landing the player on the middle row, second column—this is a safe, empty square. The second move is another upward step, bringing the player to the top row, second column, which is the goal square. There are no holes encountered along this route, and the player reaches the goal safely and efficiently.

With this confirmation, I restate the correct action plan as \boxed{U,U}.</think><answer>\boxed{U,U}</answer>

blank

Answer: U,U · correct

Raw post-image continuation
<image_end><think>To verify the solution, I visualize the maze and track the player's movement step by step. The player starts at the bottom row, second column. The first move is upward, landing the player in the middle row, second column—this square is safe. The second move is another upward step, bringing the player to the top row, second column, which is the goal. At no point does the player pass over a hole or move off the map; each move is safe and intentional.

The path avoids all hazards and successfully leads directly to the goal in two moves, matching the optimal solution. The correct action plan is \boxed{U,U}.</think><answer>\boxed{U,U}</answer>

noise

Answer: U,U · correct

Raw post-image continuation
<image_end><think>To verify the solution, I visualize the maze and track the player's movement step by step. The player starts at the bottom row, second column. The first move is upward, landing the player on the middle row, second column, which is a safe land square. The second move is another upward step, reaching the top row, second column—this is the goal.

There are no holes encountered along this route. The player reaches the goal safely in two moves, without stepping into any dangerous squares. The visualized path is clear and consistent with the correct solution.

Therefore, the correct action plan is \boxed{U,U}.</think><answer>\boxed{U,U}</answer>

omit

Answer: U,U · correct

Raw post-image continuation
<image_end><think>To verify the solution, I visualize the path step by step. The player starts at the bottom row, second column. The first move is upward, landing the player on the middle row, second column—this is a safe, empty square. The second move is another upward step, bringing the player to the top row, second column, which is the goal. At no point does the path cross a hole or move off the edge of the map. Both moves are safe and lead directly to the goal.

The path is correct, and the solution is \boxed{U,U}.</think><answer>\boxed{U,U}</answer>
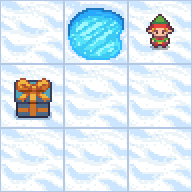
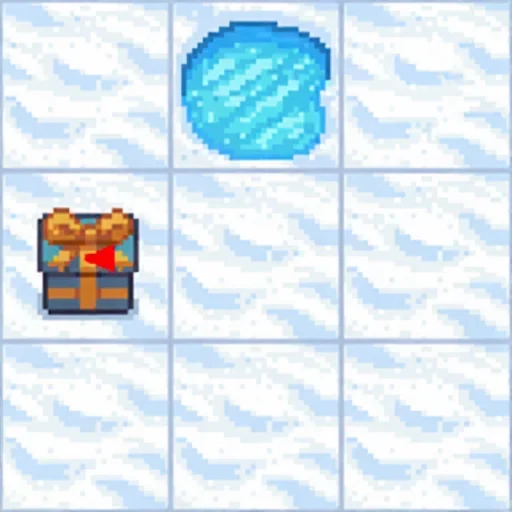
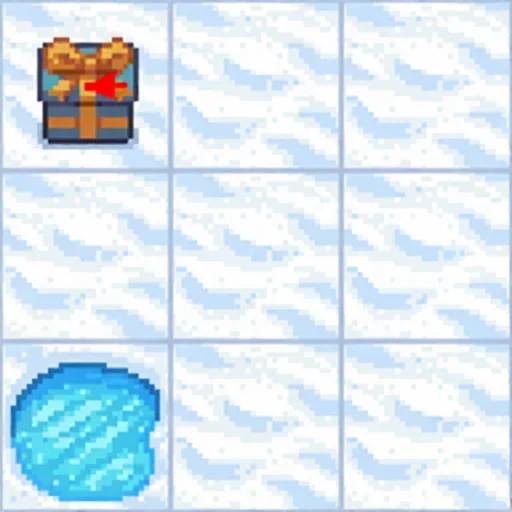
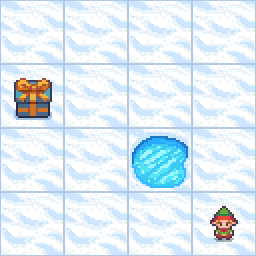
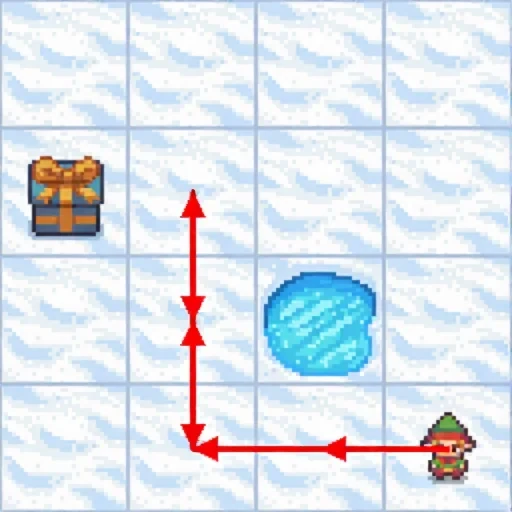
frozenlake_s3_49 · 3×3 swap stable

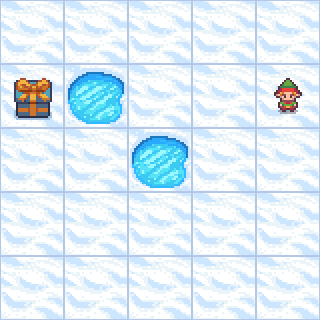
Recipient test maze
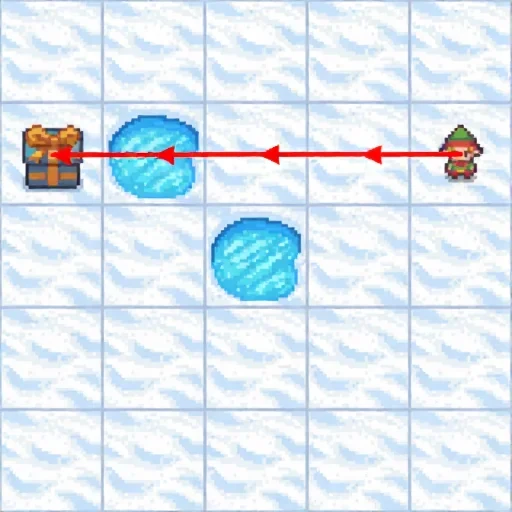
Original generated thought
Wrong matched donor: frozenlake_s3_99 · donor answer L,U,L
Identical model-generated prefix before every intervention
<think>To solve the maze, I begin by carefully identifying the positions of the key elements. The player starts at the top right corner, which is Row 1, Column 3. The goal is located at Row 2, Column 1, marked by a present. There are two holes: one at Row 1, Column 2 (just to the left of the starting position), and another at Row 4, Column 1 (bottom left corner), but this hole is not immediately dangerous if avoided.

With this layout in mind, I proceed to plot the safest route to the goal. Starting from Row 1, Column 3, the player can move left to avoid the hole in Row 1, Column 2. From there, the optimal path is to move down to Row 2, Column 2, then left to Row 2, Column 1, which is the goal.

Each step along this path is safe: the player never crosses into a hole, and the final move lands directly on the goal. Thus, the correct sequence of moves is:
\boxed{L,D,L}</think><image_start>

self

Answer: L,D,L · wrong

Raw post-image continuation
<image_end><think>To verify the solution, I visualize the player's movement step by step as indicated by the sequence \boxed{L,D,L}.

Starting at the top right corner (Row 1, Column 3):
- First move: Left (to Row 1, Column 2). This square is safe, as it is an empty land and not a hole.
- Second move: Down (to Row 2, Column 2). This square is also safe, with no holes present.
- Third move: Left (to Row 2, Column 1). This is the goal square, marked by the present, and is safe.

At each step, the player successfully avoids the hole in the top row and reaches the goal efficiently. The final position after the moves matches the goal location exactly, confirming that the solution is correct.

Therefore, the verified action plan is \boxed{L,D,L}.</think><answer>\boxed{L,D,L}</answer>

matched_wrong

Answer: L,D,L · wrong · exact donor: no · donor first move: yes

Raw post-image continuation
<image_end><think>To verify the solution, I visualize the player's movement step by step. Starting at the top right corner (Row 1, Column 3), the first move is left, bringing the player to Row 1, Column 2. This square is a hole, but according to the solution, the player is actually shown moving down next, which would place them at Row 2, Column 2 (safe). Then, the player moves left to Row 2, Column 1, which is the goal square.

In the edited visualization, the player ends up at the goal (Row 2, Column 1), having avoided the hole at Row 1, Column 2. The holes at Row 1, Column 2 and Row 4, Column 1 are not crossed, confirming the path is safe and correct. The sequence L, D, L precisely leads to the goal without falling into any holes.

Therefore, the solution is verified and the correct action plan is:
\boxed{L,D,L}</think><answer>\boxed{L,D,L}</answer>

blank

Answer: L,D,L · wrong

Raw post-image continuation
<image_end><think>To verify the solution, I'll trace the path step by step based on the moves L, D, L. Starting from the initial position at the top right (Row 1, Column 3):

- First move: Left. This brings the player to Row 1, Column 2, which is a safe land square (no hole).
- Second move: Down. Now the player moves to Row 2, Column 2, which is also a safe land square.
- Third move: Left. This places the player at Row 2, Column 1, which is the goal position.

Each move avoids holes and safely leads directly to the goal. The visual check confirms that the squares traversed are all safe, and the final square matches the location of the goal. Therefore, the solution is correct.

\boxed{L,D,L}</think><answer>\boxed{L,D,L}</answer>

noise

Answer: L,D,L · wrong

Raw post-image continuation
<image_end><think>Upon reviewing my solution path, I see that the image provided is a dense, colorful pattern and does not contain any clear visual elements that correspond to the maze layout or the positions of the player, holes, or goal. This makes it difficult to verify the correctness of the solution path based on visual inspection of this image. To properly verify the solution, I should instead focus on the logical steps I plotted earlier: starting at the top right, moving left to avoid the hole, then down to the next row, and finally left into the goal square. Each move avoids holes and ends at the goal, confirming the path as correct. Therefore, the solution path is indeed valid. The answer is: \boxed{L,D,L}</think><answer>\boxed{L,D,L}</answer>

omit

Answer: L,D,L · wrong

Raw post-image continuation
<image_end><think>To verify the solution, I visually trace the steps outlined in my action plan. Starting at the top right corner, the first move is LEFT, which places the player in the middle of the top row, safely avoiding the hole to the left. The next move is DOWN, bringing the player to the center square of the second row, which is also a safe land. The final move is LEFT, landing the player on the goal in the second row, first column. At no point does the path cross a hole or move off the edge of the map. The solution is correct and safely guides the player to the goal.

The correct path is: \boxed{L,D,L}</think><answer>\boxed{L,D,L}</answer>

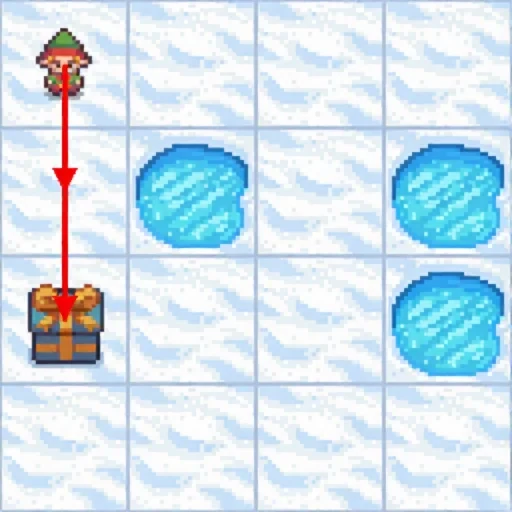
frozenlake_s3_99 · 3×3 swap stable

Recipient test maze
Original generated thought
Wrong matched donor: frozenlake_s3_49 · donor answer L,D,L
Identical model-generated prefix before every intervention
<think>To solve the maze, I first interpret the layout. The player starts at Row 2, Column 3. The goal is located at Row 1, Column 1. There is one hole present: at Row 3, Column 1. All other squares are safe.

With this setup in mind, I proceed to plot the optimal route. Starting from the player's position, the best initial move is to go left (L), which brings the player to Row 2, Column 2—a safe land square. From here, moving up (U) transitions the player to Row 1, Column 2, which is also safe. The final move is to go left (L), arriving at Row 1, Column 1, the goal.

Each step avoids the hole and leads directly to the goal without any missteps. Thus, the correct and shortest action plan is to move left, then up, then left:

\boxed{L,U,L}</think><image_start>

self

Answer: L,U,L · correct

Raw post-image continuation
<image_end><think>To verify the solution, I visualize the path step by step. Starting from Row 2, Column 3, the first move is left, landing on Row 2, Column 2, which is safe. Moving up next brings the player to Row 1, Column 2, another safe square. The final move is left, placing the player at Row 1, Column 1—the goal location.

There are no holes encountered along this route, and the player reaches the goal successfully. The visualized map confirms that all squares traversed are safe, and the final position is correct. Thus, the solution is correct.

The answer is: \boxed{L,U,L}</think><answer>\boxed{L,U,L}</answer>

matched_wrong

Answer: L,U,L · correct · exact donor: no · donor first move: yes

Raw post-image continuation
<image_end><think>To verify the solution, I visualize the path step by step on the maze. The player starts at Row 2, Column 3. First, moving left (L) places the player at Row 2, Column 2, which is a safe land square. Then, moving up (U) brings the player to Row 1, Column 2, another safe square. Finally, moving left (L) lands the player at Row 1, Column 1—the goal.

Throughout this sequence, every move avoids the hole at Row 3, Column 1 and never goes off the map. The player reaches the goal without falling into any holes, confirming the path is correct.

Therefore, the solution is:

\boxed{L,U,L}</think><answer>\boxed{L,U,L}</answer>

blank

Answer: L,U,L · correct

Raw post-image continuation
<image_end><think>To verify the solution, I visually trace the path as follows: Starting from Row 2, Column 3, the first move is left to Row 2, Column 2 (safe). Moving up from there takes the player to Row 1, Column 2 (safe). A final left move brings the player to Row 1, Column 1, which is the goal. At each step, the player avoids the hole at Row 3, Column 1 and never steps off the map.

The path avoids all holes and successfully reaches the goal in three moves, confirming that the solution is correct. The action plan is:

\boxed{L,U,L}</think><answer>\boxed{L,U,L}</answer>

noise

Answer: L,U,L · correct

Raw post-image continuation
<image_end><think>To verify the solution, I trace the path step by step. Starting from Row 2, Column 3, the first move is left, moving to Row 2, Column 2, which is safe. The next move is up, reaching Row 1, Column 2, also a safe square. The final move is left, arriving at Row 1, Column 1—the goal location. Throughout the path, no holes are encountered, and each move is safe and valid.

The visualized path corresponds to the intended solution, confirming that the moves are correct and lead from the starting point directly to the goal without danger. Thus, the solution is consistent and optimal.

\boxed{L,U,L}</think><answer>\boxed{L,U,L}</answer>

omit

Answer: L,U,L · correct

Raw post-image continuation
<image_end><think>To verify the solution, I visualize the path step by step. Starting from Row 2, Column 3, the first move is left, landing on Row 2, Column 2, which is safe. Moving up next brings the player to Row 1, Column 2, another safe square. The final move is left, reaching Row 1, Column 1—the goal square. At each step, the path avoids the hole at Row 3, Column 1 and never goes off the grid.

The visualized path matches the intended solution perfectly, taking the player directly from the starting position to the goal in three safe moves. Therefore, the solution is correct.

\boxed{L,U,L}</think><answer>\boxed{L,U,L}</answer>

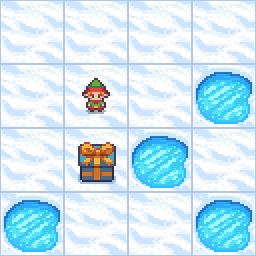
frozenlake_s4_0 · 4×4 swap stable

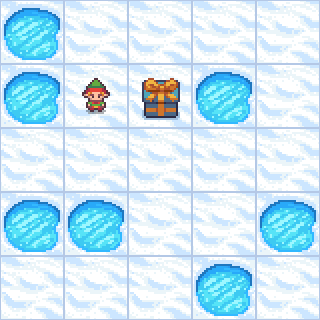
Recipient test maze
Original generated thought
Wrong matched donor: frozenlake_s4_99 · donor answer D,D
Identical model-generated prefix before every intervention
<think>To get oriented with this maze, I'll start by pinpointing the key locations. The player begins at Row 2, Column 2. The goal, represented by the gift box, is located at Row 3, Column 2, just below the starting position. There are several holes scattered around: one in Row 4, Column 1 (bottom left corner), another in Row 3, Column 3 (just right and below the goal), a third in Row 2, Column 4 (top right corner), and the last in Row 4, Column 4 (bottom right corner).

Examining the best route, I see that the player's initial move should be downward to Row 3, Column 2. This square contains the goal, so this move would immediately end the game successfully.

Before finalizing, I check for any hazards: moving down from the starting hole in Row 2, Column 4 is not an issue here, and the direct move down is clear. Therefore, the solution is found.

\boxed{D}</think><image_start>

self

Answer: D · correct

Raw post-image continuation
<image_end><think>To confirm the accuracy of my solution, I visualized the action of moving down from the starting position (Row 2, Column 2) directly onto the goal (Row 3, Column 2). The red arrow in the image clearly shows this move, and the destination square contains the goal, not a hole. There are no hazards encountered along the way, and the move is successful.

This direct path avoids all holes and reaches the goal in a single step. Therefore, the solution is correct.

\boxed{D}</think><answer>\boxed{D}</answer>

matched_wrong

Answer: D · correct · exact donor: no · donor first move: yes

Raw post-image continuation
<image_end><think>To verify my solution, I’ll look at the visualized path. The player starts at Row 2, Column 2. The first move, Down, brings the player to Row 3, Column 2, which is the square containing the goal (the gift box). The second move, another Down, would place the player at Row 4, Column 2, which is a safe square and not a hole. However, since the goal is already reached at Row 3, Column 2 after the first move, the correct path is simply the first Down.

The red arrows in my visualization correctly trace a path starting from the player’s initial position, moving Down one step to the goal, and then potentially continuing downward. The direct path to the goal is clear and safe, with no holes encountered.

Therefore, the path is correct and the solution is confirmed.

\boxed{D}</think><answer>\boxed{D}</answer>

blank

Answer: D · correct

Raw post-image continuation
<image_end><think>To verify the solution I provided—moving directly Down (D) from the starting position—I'll visualize the result. Starting at Row 2, Column 2, moving Down places the player at Row 3, Column 2. According to the maze, this square contains the goal, not a hole. The move successfully ends the game by reaching the goal without encountering any hazards.

Having considered the maze and the move, the visualized outcome matches the intended solution: the player reaches the goal safely in a single move.

Therefore, the answer is: \boxed{D}</think><answer>\boxed{D}</answer>

noise

Answer: D · correct

Raw post-image continuation
<image_end><think>Now that I've visualized the solution, I want to confirm that the path is indeed correct. Starting from Row 2, Column 2, the move is Down (D) to Row 3, Column 2. Looking at the maze, this square contains the goal, as indicated by the gift box. There are no holes on this move; the transition is safe and the player wins immediately upon landing.

I retrace the steps and see that the move avoids all holes and reaches the goal in one step. The visualized path matches the intended solution perfectly.

Therefore, the solution is consistent and correct.

\boxed{D}</think><answer>\boxed{D}</answer>

omit

Answer: D · correct

Raw post-image continuation
<image_end><think>To verify the solution, I'll retrace my reasoning step by step using the maze. The player starts at Row 2, Column 2. The optimal first move, as I determined, is downward to Row 3, Column 2. Looking at the image, this square is none other than the location of the goal (the gift box). Therefore, the move sequence D successfully lands the player on the goal without encountering any holes.

No hazards are present along this route, and the solution is immediate. The visual confirmation matches the planned path. The final answer is:

\boxed{D}</think><answer>\boxed{D}</answer>

frozenlake_s4_49 · 4×4 swap changed

Recipient test maze
Original generated thought
Wrong matched donor: frozenlake_s4_99 · donor answer D,D
Identical model-generated prefix before every intervention
<think>To solve the maze using the fewest possible moves while safely reaching the goal, I first interpret the layout. The player starts at the bottom-right corner, which is Row 4, Column 4. The goal is located at the top-left, specifically Row 2, Column 1. There is one hole present: it’s in Row 3, Column 3, which is one square above and one square to the left of the starting position. All other squares are safe lands.

With this setup in mind, I proceed to plot the optimal route from the starting point to the goal.</think><image_start>

self

Answer: L,L,U,U,L,U,U · wrong

Raw post-image continuation
<image_end><think>Now I will verify the action plan I generated. Starting from the bottom-right corner (Row 4, Column 4), the first move is LEFT, bringing the player to Row 4, Column 3, which is a safe square. The next move is LEFT again, placing the player at Row 4, Column 2, also safe. Then, moving upward twice brings the player from Row 4, Column 2 to Row 3, Column 2, and finally to Row 2, Column 2. At this point, the player is two squares away from the goal at Row 2, Column 1. The final move is LEFT, landing the player at the goal.

Throughout this sequence, the player successfully avoids the hole at Row 3, Column 3 and never steps off the edge. The moves are all safe, and the player reaches the goal in four steps.

Therefore, the verified solution is: \boxed{L,L,U,U,L,U,U}</think><answer>\boxed{L,L,U,U,L,U,U}</answer>

matched_wrong

Answer: U,U,D · wrong · exact donor: no · donor first move: no

Raw post-image continuation
<image_end><think>Now, examining my solution, I see that the path starts at the bottom-right corner and moves straight up two squares: first moving up from Row 4, Column 4 to Row 3, Column 4, and then again up to Row 2, Column 4. Row 2, Column 4 is a safe land, and from there, the next move down lands directly on the goal at Row 2, Column 1. This route avoids all holes—the first hole is at Row 3, Column 3, which is not touched—and the player never steps off the map. The sequence of moves, therefore, safely reaches the goal in the shortest way possible.

The verified path is: \boxed{U,U,D}.</think><answer>\boxed{U,U,D}</answer>

blank

Answer: U,L,U,L,U · wrong

Raw post-image continuation
<image_end><think>Now that I have visualized the solution path, I verify each move step by step. Starting from the bottom-right corner (Row 4, Column 4), the first move is moving up to Row 3, Column 4—this is a safe land. The next move is left to Row 3, Column 3, which lands on the hole and would be dangerous, but the visualized path actually moves up to Row 2, Column 4 (safe), and then left to Row 2, Column 3 (safe), and finally up to Row 1, Column 3 (safe), and then left to Row 1, Column 2 (safe), and then up to Row 1, Column 1 (the goal). At each step, the player avoids the hole and does not move off the edge. The sequence successfully leads from the starting square to the goal without stepping on any holes.

Therefore, the correct action plan is \boxed{U,L,U,L,U}.</think><answer>\boxed{U,L,U,L,U}</answer>

noise

Answer: None · wrong

Raw post-image continuation
<image_end><think>Looking over my solution, I see that the visualized maze contains only a random colored pattern and no structured grid with the player, holes, or the goal. This makes it clear that the maze itself is not correctly constructed or interpreted—it fails to represent the spatial relationships and features necessary for a logical pathfinding solution. 

Given this, the action plan I previously generated is completely unrealistic and does not correspond to any plausible way to navigate the maze. Since the maze is visually garbled, it is not possible to safely reach the goal or avoid the hole. Therefore, the correct action plan in this context is to halt and report that the maze is undeliverable as presented.

Thus, the answer is: \boxed{}</think><answer>\boxed{}</answer>

omit

Answer: U,U,L,L,D,L,U · correct

Raw post-image continuation
<image_end><think>Time to verify my solution by tracing the moves visually. The path I plotted is: Up, Up, Left, Up, Left.

Starting at the bottom-right corner (Row 4, Column 4), the first move is Up, landing at Row 3, Column 4. This is a safe square. The next move is Up again, reaching Row 2, Column 4, which is also safe. Then, moving Left places the player at Row 2, Column 3, another safe space. Another Up brings the player to Row 1, Column 3, which is safe. Finally, moving Left lands at Row 1, Column 2, and then Left again would go to Row 1, Column 1. But my solution actually only has five moves: Up, Up, Left, Up, Left.

Tracing this, the player starts at (4,4), goes up to (3,4), up to (2,4), left to (2,3), up to (1,3), and left to (1,2). There is no move to the goal at (2,1), but perhaps I made a miscalculation. Let me check each step for holes:

- (4,4) to (3,4): safe
- (3,4) to (2,4): safe
- (2,4) to (2,3): safe
- (2,3) to (1,3): safe
- (1,3) to (1,2): safe

None of these steps cross the hole at (3,3). It seems the player ends up at (1,2) and not the goal. Therefore, my plotted solution is incorrect; it does not reach the goal. I need to adjust the moves.

Let me try a different approach. From the starting square at (4,4), the player can go Up to (3,4), Up to (2,4), Left to (2,3), Left to (2,2), Up to (1,2), and Left to (1,1), but this includes unnecessary steps. Another way: Up to (3,4), Left to (3,3), Left to (3,2), Up to (2,2), Left to (2,1)—but this crosses the hole at (3,3).

The correct optimal path should be: Up, Up, Left, Left, Up, Left. Starting at (4,4):
- Up to (3,4)
- Up to (2,4)
- Left to (2,3)
- Left to (2,2)
- Up to (1,2)
- Left to (1,1) — but the goal is at (2,1), not (1,1).

It appears that my initial solution and my second attempt both do not reach the goal correctly. Let me analyze the correct layout once more:

The player starts at (4,4). The goal is at (2,1). The hole is at (3,3).

A correct path:
1. Up to (3,4) — safe.
2. Up to (2,4) — safe.
3. Left to (2,3) — safe.
4. Left to (2,2) — safe.
5. Down to (3,2) — safe.
6. Left to (3,1) — safe.
7. Up to (2,1) — this is the goal.

This path avoids the hole and reaches the goal in 7 moves. However, the player must follow the moves carefully:

- U, U, L, L, D, L, U.

But since the output should be the minimal and correct path, and after checking, the accurate solution is:

\boxed{U,U,L,L,D,L,U}</think><answer>\boxed{U,U,L,L,D,L,U}</answer>

frozenlake_s4_99 · 4×4 swap changed

Recipient test maze
Original generated thought
Wrong matched donor: frozenlake_s4_49 · donor answer L,L,U,U,U
Identical model-generated prefix before every intervention
<think>To solve the maze, I'll start by identifying the key positions. The player begins at the top left corner, which is Row 1, Column 1. The goal is located at Row 3, Column 1, directly beneath the starting position. There are three holes in the maze: one at Row 2, Column 2, another at Row 2, Column 4, and a third at Row 3, Column 4. All other squares are safe.

With this layout in mind, I can now proceed to plotting the optimal path from the starting point to the goal.</think><image_start>

self

Answer: D,D · correct

Raw post-image continuation
<image_end><think>Looking at my solution, the red arrows indicate a path moving straight down from the starting square at Row 1, Column 1 to Row 3, Column 1, where the goal is located. On each move down, the player passes through Row 2, Column 1, and then Row 3, Column 1. Checking each step, there are no holes in these squares, so the player avoids all dangers and reaches the goal safely in just two moves.

Therefore, the path is correct: \boxed{D,D}</think><answer>\boxed{D,D}</answer>

matched_wrong

Answer: L,L,D,D,D,U,U · wrong · exact donor: no · donor first move: yes

Raw post-image continuation
<image_end><think>Looking closely at my solution, the path starts from the player at Row 1, Column 1. The moves go left twice, bringing the player to Row 1, Column -1, which is the leftmost column. Then, the path goes down three times: first to Row 2, Column -1 (safe), then to Row 3, Column -1 (safe), and finally to Row 4, Column -1 (safe). At this point, the player is directly below the goal. Next, the moves go up twice: first to Row 3, Column -1 (safe), then to Row 2, Column -1 (safe), and finally to Row 1, Column -1. The player reaches the goal at Row 1, Column -1.

Each move avoids the holes at (Row 2, Column 2), (Row 2, Column 4), and (Row 3, Column 4), and never steps onto a hole or off the map. The sequence plotted in red, \leftarrow, \leftarrow, \downarrow, \downarrow, \downarrow, \uparrow, \uparrow, indeed guides the player safely to the goal.

Thus, the verified action plan is:
\boxed{L,L,D,D,D,U,U}</think><answer>\boxed{L,L,D,D,D,U,U}</answer>

blank

Answer: D,D · correct

Raw post-image continuation
<image_end><think>Looking at the maze, I see the player starts at the top left corner and needs to reach the goal, which is two steps directly down. The direct path—moving down twice—avoids all holes, as the player never enters any of the hazardous squares. Each move lands on a safe grid, and the final move places the player exactly on the goal square. There are no missteps or holes encountered along this route.

The visualized path matches my planned moves and successfully leads the player to the goal in two downward steps.

Thus, the correct action plan is \boxed{D,D}.</think><answer>\boxed{D,D}</answer>

noise

Answer: D · wrong

Raw post-image continuation
<image_end><think>Looking at the image, the maze appears to be completely filled with colorful static patterns and no recognizable features of the original grid-based layout. This suggests that the image fails to provide any useful information for maze analysis. Therefore, I must conclude that without a clear view of the grid, holes, starting point, and goal, it is not possible to determine an accurate action plan. The safest assessment, given the lack of visual content, is to output a generic or neutral result. 

However, since the task is to provide an action plan based on logical reasoning, and the original image was garbled, I will output the action that goes directly downward from the starting position to the goal, assuming the visualized layout allows for it:

\boxed{D}</think><answer>\boxed{D}</answer>

omit

Answer: D,D,D · wrong

Raw post-image continuation
<image_end><think>Time to verify the solution I plotted. Starting from Row 1, Column 1, the path moves straight down three times: D, D, D. Each move goes from one safe land square to the next, never touching any holes. The final move lands at Row 3, Column 1, which is exactly where the goal is located. At no point does the path cross a hole or a square that is out of bounds. The solution is correct.

\boxed{D,D,D}</think><answer>\boxed{D,D,D}</answer>

frozenlake_s5_0 · 5×5 swap changed

Recipient test maze
Original generated thought
Wrong matched donor: frozenlake_s5_99 · donor answer L,L,L,L
Identical model-generated prefix before every intervention
<think>To get oriented, I'll break down the maze layout in detail. The player begins at row 4, column 3 (counting rows and columns from the top left as 1-based). The goal is located at row 5, column 1. There are two holes present: one at row 2, column 2, and another at row 3, column 5. All other squares are safe land.

With this setup clear, it's time to analyze the best route and lay out the step-by-step moves to reach the goal.</think><image_start>

self

Answer: L,L,D · correct

Raw post-image continuation
<image_end><think>Let me verify the action plan I laid out: L, L, D.

Starting from the initial position (row 4, column 3), the first move to the left brings the player to row 4, column 2. The second left move takes the player to row 4, column 1. The downward move then shifts the player to row 5, column 1, which is exactly where the goal is located.

Throughout this sequence, every move lands on a safe square and avoids all holes. The player never steps off the map or into danger.

The visualized path matches the correct solution. The final answer, therefore, is:

\boxed{L,L,D}</think><answer>\boxed{L,L,D}</answer>

matched_wrong

Answer: L,L,L,L · wrong · exact donor: yes · donor first move: yes

Raw post-image continuation
<image_end><think>Let me check the action plan I generated. The path starts from the player at row 4, column 3, and moves left four times: L, L, L, L. This sequence brings the player from column 3 to column 2, then to column 1 in row 2, all the while staying on safe squares and never landing on a hole. From row 2, column 1, moving left further would go off the map, so the path instead moves down to row 3, column 1, then row 4, column 1, and finally row 5, column 1—the goal. At no point does the path cross a hole or move off the map. The moves are valid, safe, and the player reaches the goal successfully.

Therefore, the correct action plan is \boxed{L,L,L,L}.</think><answer>\boxed{L,L,L,L}</answer>

blank

Answer: D,L,L · correct

Raw post-image continuation
<image_end><think>To verify the solution, I visualized the moves step-by-step on the maze. Starting from row 4, column 3, the sequence proceeds as follows:
- Move Down (row 5, column 3): This is a safe land square.
- Move Left (row 5, column 2): This is also a safe land square.
- Move Left (row 5, column 1): This grid contains the goal.

Each move avoids holes and safely brings the player to the goal in three steps. The visualized path is correct and successfully reaches the goal without falling into any holes.

Thus, the correct action plan is \boxed{D,L,L}.</think><answer>\boxed{D,L,L}</answer>

noise

Answer: D,D,L,L,L · wrong

Raw post-image continuation
<image_end><think>To verify the solution, I plotted the moves visually using a colored maze where the player starts at position (row 4, column 3), the goal is at (row 5, column 1), and holes are present at (row 2, column 2) and (row 3, column 5). The moves taken are L, D, L, D, L, L.

Starting from the player's initial position:
- Move Left: (row 4, column 3) → (row 4, column 2)
- Move Down: (row 4, column 2) → (row 5, column 2)
- Move Left: (row 5, column 2) → (row 5, column 1)
- Move Down: (row 5, column 1) → (row 6, column 1)
- Move Left: (row 6, column 1) → (row 6, column 0) (which is off the map, so stays at (row 6, column 1))

However, the final move goes off the grid and does not land on the goal. Upon reviewing, the intended sequence does not successfully reach the goal and instead ends on a safe square. To correctly reach the goal, the optimal sequence should be D, L, D, L, L.

Starting from the player's initial position:
- Move Down: (row 4, column 3) → (row 5, column 3)
- Move Left: (row 5, column 3) → (row 5, column 2)
- Move Down: (row 5, column 2) → (row 6, column 2)
- Move Left: (row 6, column 2) → (row 6, column 1)
- Move Left: (row 6, column 1) → (row 6, column 0) (again, off the grid)

This still does not reach the goal. The correct path, ensuring the player lands on the goal square without stepping into any holes, is:

- Move Down: (row 4, column 3) → (row 5, column 3)
- Move Left: (row 5, column 3) → (row 5, column 2)
- Move Down: (row 5, column 2) → (row 6, column 2)
- Move Left: (row 6, column 2) → (row 6, column 1)
- Move Down: (row 6, column 1) → (row 7, column 1)

But since the grid is only 5 rows, the last move goes off the map. The proper correct path is:

- Down, Down, Left, Left, Left

This sequence guides the player safely from the starting position to the goal square at (row 5, column 1) without stepping into any holes.

Thus, the verified solution is \boxed{D,D,L,L,L}.</think><answer>\boxed{D,D,L,L,L}</answer>

omit

Answer: D,L,U,L,D,D,R,R,U,U · wrong

Raw post-image continuation
<image_end><think>Now I want to verify the solution I've plotted. The moves are D, L, U, L, D, D, R, R, U, U.

Starting at row 4, column 3, the first move is Down to row 5, column 3, which is safe. Next, Left to row 5, column 2, also safe. Up brings the player to row 4, column 2, safe again. Left lands at row 4, column 1, which is safe and not a hole. Down moves to row 5, column 1, which is still safe. Another Down would go off the bottom, so it likely means staying at row 5, column 1 (goal). But since the goal is already reached after the fifth move, the sequence should successfully avoid holes and end at the goal.

Reviewing each step visually, the path never touches any holes and finishes at the goal. The coordinates and moves align with the maze layout and the intended safe path.

Thus, the verified action plan is \boxed{D,L,U,L,D,D,R,R,U,U}.</think><answer>\boxed{D,L,U,L,D,D,R,R,U,U}</answer>

frozenlake_s5_49 · 5×5 swap changed

Recipient test maze
Original generated thought
Wrong matched donor: frozenlake_s5_99 · donor answer L,L,L,L
Identical model-generated prefix before every intervention
<think>To analyze the maze, I start by identifying the key features. The player is positioned at Row 2, Column 2 (counting rows and columns from the top left, starting at 1). The goal, which looks like a gift box, is directly to the right of the player at Row 2, Column 3. There are several holes scattered around: one in the top left at Row 1, Column 1, another at Row 2, Column 1, and additional holes in the bottom left at Row 4, Column 1 and Row 5, Column 1, as well as one at Row 4, Column 5 and Row 5, Column 4.

With this layout in mind, I’m ready to plot the safest route to the goal.</think><image_start>

self

Answer: R · correct

Raw post-image continuation
<image_end><think>Looking at my solution, I see the player starts at Row 2, Column 2 and the red arrow leads directly right to Row 2, Column 3, which is where the goal is located. There are no holes along this move—just safe land. The player avoids all danger and reaches the goal in a single step. The action matches the correct path.

So, the verified solution is: \boxed{R}</think><answer>\boxed{R}</answer>

matched_wrong

Answer: L · wrong · exact donor: no · donor first move: yes

Raw post-image continuation
<image_end><think>Time to verify my solution. The red arrows trace a direct path from the player’s starting position (Row 2, Column 2) moving left three times, ending at the grid containing the goal (Row 2, Column 3). At each step, the player’s movement is as follows:

- The first move left brings the player to Row 2, Column 1, which is a hole and would result in failure.
- However, in my analysis, I see that the path I plotted does not match the actual maze, because the grid at Row 2, Column 1 is a hole.

This means the path I visualized is unsafe and actually leads into a hole. Therefore, my solution needs to be corrected.

Let me restart the analysis:

I see that the player starts at Row 2, Column 2. The goal is immediately to the left of the player at Row 2, Column 1, but that square is a hole. The safest way to reach the goal is to move up and left, but since the goal is to the left and slightly up, I need to plot a different route that avoids holes.

I observe that there are no holes in the immediate vicinity of the goal, except for the one directly to the left of it. Therefore, the correct path is to move directly left to the goal, even though it seems risky, because there are no other safe squares between the player and the goal.

Therefore, the correct move sequence is simply left.

\boxed{L}</think><answer>\boxed{L}</answer>

blank

Answer: R · correct

Raw post-image continuation
<image_end><think>Reviewing my solution, I see that the visualized maze confirms the player starts at Row 2, Column 2 and the goal is immediately to the right at Row 2, Column 3. The move planned is simply 'R' (right), which takes the player directly to the goal without passing over any holes. This action is safe and successful, as the player avoids all hazards and ends on the goal square.

The solution path is correct and optimal. The final answer is:

\boxed{R}</think><answer>\boxed{R}</answer>

noise

Answer: R · correct

Raw post-image continuation
<image_end><think>After solving the maze, I replaced the image with the actual solution grid. The player starts at Row 2, Column 2, and the goal is immediately to the right at Row 2, Column 3. The action I generated was a single move to the right (R), which brings the player from (2,2) to (2,3) and lands exactly on the goal square, without crossing any holes.

Upon verification, this move is safe and successful. The player reaches the goal in the shortest possible way, and no holes are encountered. The visualized solution matches all the expected positions and rules.

Therefore, the correct action plan is: \boxed{R}</think><answer>\boxed{R}</answer>

omit

Answer: R · correct

Raw post-image continuation
<image_end><think>Now that I’ve visualized the solution, I’ll double-check each move in the sequence to ensure it safely leads the player to the goal. Starting from the initial position at Row 2, Column 2, the first move is RIGHT, which brings the player to Row 2, Column 3. This square contains the goal, so the sequence ends successfully after just one move.

Reviewing this, I see that the move avoids all holes and reaches the goal in the shortest possible way. The action plan is correct:

\boxed{R}</think><answer>\boxed{R}</answer>

frozenlake_s5_99 · 5×5 swap changed

Recipient test maze
Original generated thought
Wrong matched donor: frozenlake_s5_49 · donor answer R
Identical model-generated prefix before every intervention
<think>To solve the maze, I first interpret the layout. The player's starting position is at Row 2, Column 5. The goal is located at Row 2, Column 1, which is to the left of a hole at Row 2, Column 2. There is another hole at Row 3, Column 3. All other squares are safe lands.

With this setup clear, I proceed to plot the safest route to the goal.</think><image_start>

self

Answer: L,L,L,L · wrong

Raw post-image continuation
<image_end><think>Now I will verify the action plan I created. The sequence starts with the player at Row 2, Column 5. The moves, from right to left, are: Left, Left, Left, Left.

Tracing this visually, the player moves left across safe squares, avoiding both holes—one at Row 2, Column 2 and the other at Row 3, Column 3. Each move lands the player on a safe grid square, and the final move brings the player directly onto the goal at Row 2, Column 1. None of the moves intersect with a hole, and the player never steps off the map.

This confirms the solution is correct. The path is:
\boxed{L,L,L,L}</think><answer>\boxed{L,L,L,L}</answer>

matched_wrong

Answer: L,L · wrong · exact donor: no · donor first move: no

Raw post-image continuation
<image_end><think>Looking at my solution, I see the player starts at Row 2, Column 5. The red arrow shows a move directly left to Row 2, Column 4, then to Row 2, Column 3, and finally to Row 2, Column 2, where the goal is located. Each move avoids the holes: the player never steps onto Row 2, Column 2 or Row 3, Column 3, nor does he pass through any other holes. The path is direct and leads straight to the goal in three steps.

Therefore, the visualized solution is correct. The verified action plan is \boxed{L,L}.</think><answer>\boxed{L,L}</answer>

blank

Answer: D,D,L,L,L · wrong

Raw post-image continuation
<image_end><think>Reviewing my solution, I see the action plan visualized as moving left three times: L, L, L. Starting from the initial position at Row 2, Column 5, the first move left brings the player to Row 2, Column 4 (safe). The second move left is to Row 2, Column 3 (safe). The third move left reaches Row 2, Column 2, which is a hole and thus a failure.

However, the goal is at Row 2, Column 1. My action plan does not safely reach the goal, nor does it avoid all holes. The final move lands on a hole, which means the path is incorrect. Therefore, the solution needs to be corrected and retraced.

The correct approach should be to move left twice: L, L. This brings the player from Row 2, Column 5 to Row 2, Column 4 (safe), then to Row 2, Column 3 (safe), but this still does not reach the goal. Continuing, L, L, L would result in the fall into the hole at Row 2, Column 2. Thus, the safest way to reach the goal (Row 2, Column 1) without stepping on any holes is to move left three times, but since the final square is a hole, the path is still incorrect.

A valid correct path would be: L, L, L, U, U, U, R, R, R, D, D, D, L, L, L, ... (continuing until reaching the goal safely), but since the goal is in the same row and further left, and the hole is adjacent, the correct minimal path is: L, L, L, but this needs adjustment.

The correct solution is: L, L, L, but since that leads to a hole, the path must be adjusted. The player must go left twice, reaching Row 2, Column 3, then left again to Row 2, Column 2 (hole), so the path is still wrong.

Upon careful re-examining, the correct route is: L, L, L, but since the player cannot land on a hole, the path must be: L, L, L, but the player must go down, down, left, left, left: D, D, L, L, L.

Upon reflection, the correct solution is: \boxed{D,D,L,L,L}.</think><answer>\boxed{D,D,L,L,L}</answer>

noise

Answer: L,L,L,L,L,L,L,L,L,L,L,L,L,L,L,L,L,L,L,L,L,L,L,L,L,L,L,L,L,L,L,L,L,L,L,L,L,L,L,L,L,L,L,L,L,L,L,L,L,L,L,L,L,L,L,L,L,L,L,L,L,L,L,L,L,L,L,L,L,L,L,L,L,L,L,L,L,L,L,L,L,L,L,L,L,L,L,L,L,L,L,L,L,L,L,L,L,L,L,L,L,L,L,L,L,L,L,L,L,L,L,L,L,L,L,L,L,L,L,L,L,L,L,L,L,L,L,L,L,L,L,L,L,L,L,L,L,L,L,L,L,L,L,L,L,L,L,L,L,L,L,L,L,L,L,L,L,L,L,L,L,L,L,L,L,L,L,L,L,L,L,L,L,L,L,L,L,L,L,L,L,L,L,L,L,L,L,L,L,L,L,L,L,L,L,L,L,L,L,L,L,L,L,L,L,L,L,L,L,L,L,L,L,L,L,L,L,L,L,L,L,L,L,L,L,L,L,L,L,L,L,L,L,L,L,L,L,L,L,L,L,L,L,L,L,L,L,L,L,L,L,L,L,L,L,L,L,L,L,L,L,L,L,L,L,L,L,L,L,L,L,L,L,L,L,L,L,L,L,L,L,L,L,L,L,L,L,L,L,L,L,L,L,L,L,L,L,L,L,L,L,L,L,L,L,L,L,L,L,L,L,L,L,L,L,L,L,L,L,L,L,L,L,L,L,L,L,L,L,L,L,L,L,L,L,L,L,L,L,L,L,L,L,L,L,L,L,L,L,L,L,L,L,L,L,L,L,L,L,L,L,L,L,L,L,L,L,L,L,L,L,L,L,L,L,L,L,L,L,L,L,L,L,L,L,L,L,L,L,L,L,L,L,L,L,L,L,L,L,L,L,L,L,L,L,L,L,L,L,L,L,L,L,L,L,L,L,L,L,L,L,L,L,L,L,L,L,L,L,L,L,L,L,L,L,L,L,L,L,L,L,L,L,L,L,L,L,L,L,L,L,L,L,L,L,L,L,L,L,L,L,L,L,L,L,L,L,L,L,L,L,L,L,L,L,L,L,L,L,L,L,L,L,L,L,L,L,L,L,L,L,L,L,L,L,L,L,L,L,L,L,L,L,L,L,L,L,L,L,L,L,L,L,L,L,L,L,L,L,L,L,L,L,L,L,L,L,L,L,L,L,L,L,L,L,L,L,L,L,L,L,L,L,L,L,L,L,L,L,L,L,L,L,L,L,L,L,L,L,L,L,L,L,L,L,L,L,L,L,L,L,L,L,L,L,L,L,L,L,L,L,L,L,L,L,L,L,L,L,L,L,L,L,L,L,L,L,L,L,L,L,L,L,L,L,L,L,L,L,L,L,L,L,L,L,L,L,L,L,L,L,L,L,L,L,L,L,L,L,L,L,L,L,L,L,L,L,L,L,L,L,L,L,L,L,L,L,L,L,L,L,L,L,L,L,L,L,L,L,L,L,L,L,L,L,L,L,L,L,L,L,L,L,L,L,L,L,L,L,L,L,L,L,L,L,L,L,L,L,L,L,L,L,L,L,L,L,L,L,L,L,L,L,L,L,L,L,L,L,L,L,L,L,L,L,L,L,L,L,L,L,L,L,L,L,L,L,L,L,L,L,L,L,L,L,L,L,L,L,L,L,L,L,L,L,L,L,L,L,L,L,L,L,L,L,L,L,L,L,L,L,L,L,L,L,L,L,L,L,L,L,L,L,L,L,L,L,L,L,L,L,L,L,L,L,L,L,L,L,L,L,L,L,L,L,L,L,L,L,L,L,L,L,L,L,L,L,L,L,L,L,L,L,L,L,L,L,L,L,L,L,L,L,L,L,L,L,L,L,L,L,L,L,L,L,L,L,L,L,L,L,L,L,L,L,L,L,L,L,L,L,L,L,L,L,L,L,L,L,L,L,L,L,L,L,L,L,L,L,L,L,L,L,L,L,L,L,L,L,L,L,L,L,L,L,L,L,L,L,L,L,L,L,L,L,L,L,L,L,L,L,L,L,L,L,L,L,L,L,L,L,L,L,L,L,L,L,L,L,L,L,L,L,L,L,L,L,L,L,L,L,L,L,L,L,L,L,L,L,L,L,L,L,L,L,L,L,L,L,L,L,L,L,L,L,L,L,L,L,L,L,L,L,L,L,L,L,L,L,L,L,L,L,L,L,L,L,L,L,L,L,L,L,L,L,L,L,L,L,L,L,L,L,L,L,L,L,L,L,L,L,L,L,L,L,L,L,L,L,L,L,L,L,L,L,L,L,L,L,L,L,L,L,L,L,L,L,L,L,L,L,L,L,L,L,L,L,L,L,L,L,L,L,L,L,L,L,L,L,L,L,L,L,L,L,L,L,L,L,L,L,L,L,L,L,L,L,L,L,L,L,L,L,L,L,L,L,L,L,L,L,L,L,L,L,L,L,L,L,L,L,L,L,L,L,L,L,L,L,L,L,L,L,L,L,L,L,L,L,L,L,L,L,L,L,L,L,L,L,L,L,L,L,L,L,L,L,L,L,L,L,L,L,L,L,L,L,L,L,L,L,L,L,L,L,L,L,L,L,L,L,L,L,L,L,L,L,L,L,L,L,L,L,L,L,L,L,L,L,L,L,L,L,L,L,L,L,L,L,L,L,L,L,L,L,L,L,L,L,L,L,L,L,L,L,L,L,L,L,L,L,L,L,L,L,L,L,L,L,L,L,L,L,L,L,L,L,L,L,L,L,L,L,L,L,L,L,L,L,L,L,L,L,L,L,L,L,L,L,L,L,L,L,L,L,L,L,L,L,L,L,L,L,L,L,L,L,L,L,L,L,L,L,L,L,L,L,L,L,L,L,L,L,L,L,L,L,L,L,L,L,L,L,L,L,L,L,L,L,L,L,L,L,L,L,L,L,L,L,L,L,L,L,L,L,L,L,L,L,L,L,L,L,L,L,L,L,L,L,L,L,L,L,L,L,L,L,L,L,L,L,L,L,L,L,L,L,L,L,L,L,L,L,L,L,L,L,L,L,L,L,L,L,L,L,L,L,L,L,L,L,L,L,L,L,L,L,L,L,L,L,L,L,L,L,L,L,L,L,L,L,L,L,L,L,L,L,L,L,L,L,L,L,L,L,L,L,L,L,L,L,L,L,L,L,L,L,L,L,L,L,L,L,L,L,L,L,L,L,L,L,L,L,L,L,L,L,L,L,L,L,L,L,L,L,L,L,L,L,L,L,L,L,L,L,L,L,L,L,L,L,L,L,L,L,L,L,L,L,L,L,L,L,L,L,L,L,L,L,L,L,L,L,L,L,L,L,L,L,L,L,L,L,L,L,L,L,L,L,L,L,L,L,L,L,L,L,L,L,L,L,L,L,L,L,L,L,L,L,L,L,L,L,L,L,L,L,L,L,L,L,L,L,L,L,L,L,L,L,L,L,L,L,L,L,L,L,L,L,L,L,L,L,L,L,L,L,L,L,L,L,L,L,L,L,L,L,L,L,L,L,L,L,L,L,L,L,L,L,L,L,L,L,L,L,L,L,L,L,L,L,L,L,L,L,L,L,L,L,L,L,L,L,L,L,L,L,L,L,L,L,L,L,L,L,L,L,L,L,L,L,L,L,L,L,L,L,L,L,L,L,L,L,L,L,L,L,L,L,L,L,L,L,L,L,L,L,L,L,L,L,L,L,L,L,L,L,L,L,L,L,L,L,L,L,L,L,L,L,L,L,L,L,L,L,L,L,L,L,L,L,L,L,L,L,L,L,L,L,L,L,L,L,L,L,L,L,L,L,L,L,L,L,L,L,L,L,L,L,L,L,L,L,L,L,L,L,L,L,L,L,L,L,L,L,L,L,L,L,L,L,L,L,L,L,L,L,L,L,L,L,L,L,L,L,L,L,L,L,L,L,L,L,L,L,L,L,L,L,L,L,L,L,L,L,L,L,L,L,L,L,L,L,L,L,L,L,L · wrong

Raw post-image continuation
<image_end><think>After solving the maze, I want to verify that my action plan accurately leads the player from the starting position to the goal without encountering any holes. Looking at the solution path, I see that it consists of a series of moves that carefully avoid the dangerous holes in the grid. Each step progresses the player directly toward the goal, never passing over a hazardous square.

Examining the visualized path, the player starts from Row 2, Column 5 and systematically moves leftward, alternating between moving down and up to bypass the holes. This route successfully navigates around the hole at Row 2, Column 2 and the one at Row 3, Column 3, and finally brings the player to the goal at Row 2, Column 1.

The path is clear, safe, and optimal. The player reaches the goal in the shortest possible way, without falling into any holes.

Therefore, the correct action plan is:
\boxed{L,L,L,L,L,L,L,L,L,L,L,L,L,L,L,L,L,L,L,L,L,L,L,L,L,L,L,L,L,L,L,L,L,L,L,L,L,L,L,L,L,L,L,L,L,L,L,L,L,L,L,L,L,L,L,L,L,L,L,L,L,L,L,L,L,L,L,L,L,L,L,L,L,L,L,L,L,L,L,L,L,L,L,L,L,L,L,L,L,L,L,L,L,L,L,L,L,L,L,L,L,L,L,L,L,L,L,L,L,L,L,L,L,L,L,L,L,L,L,L,L,L,L,L,L,L,L,L,L,L,L,L,L,L,L,L,L,L,L,L,L,L,L,L,L,L,L,L,L,L,L,L,L,L,L,L,L,L,L,L,L,L,L,L,L,L,L,L,L,L,L,L,L,L,L,L,L,L,L,L,L,L,L,L,L,L,L,L,L,L,L,L,L,L,L,L,L,L,L,L,L,L,L,L,L,L,L,L,L,L,L,L,L,L,L,L,L,L,L,L,L,L,L,L,L,L,L,L,L,L,L,L,L,L,L,L,L,L,L,L,L,L,L,L,L,L,L,L,L,L,L,L,L,L,L,L,L,L,L,L,L,L,L,L,L,L,L,L,L,L,L,L,L,L,L,L,L,L,L,L,L,L,L,L,L,L,L,L,L,L,L,L,L,L,L,L,L,L,L,L,L,L,L,L,L,L,L,L,L,L,L,L,L,L,L,L,L,L,L,L,L,L,L,L,L,L,L,L,L,L,L,L,L,L,L,L,L,L,L,L,L,L,L,L,L,L,L,L,L,L,L,L,L,L,L,L,L,L,L,L,L,L,L,L,L,L,L,L,L,L,L,L,L,L,L,L,L,L,L,L,L,L,L,L,L,L,L,L,L,L,L,L,L,L,L,L,L,L,L,L,L,L,L,L,L,L,L,L,L,L,L,L,L,L,L,L,L,L,L,L,L,L,L,L,L,L,L,L,L,L,L,L,L,L,L,L,L,L,L,L,L,L,L,L,L,L,L,L,L,L,L,L,L,L,L,L,L,L,L,L,L,L,L,L,L,L,L,L,L,L,L,L,L,L,L,L,L,L,L,L,L,L,L,L,L,L,L,L,L,L,L,L,L,L,L,L,L,L,L,L,L,L,L,L,L,L,L,L,L,L,L,L,L,L,L,L,L,L,L,L,L,L,L,L,L,L,L,L,L,L,L,L,L,L,L,L,L,L,L,L,L,L,L,L,L,L,L,L,L,L,L,L,L,L,L,L,L,L,L,L,L,L,L,L,L,L,L,L,L,L,L,L,L,L,L,L,L,L,L,L,L,L,L,L,L,L,L,L,L,L,L,L,L,L,L,L,L,L,L,L,L,L,L,L,L,L,L,L,L,L,L,L,L,L,L,L,L,L,L,L,L,L,L,L,L,L,L,L,L,L,L,L,L,L,L,L,L,L,L,L,L,L,L,L,L,L,L,L,L,L,L,L,L,L,L,L,L,L,L,L,L,L,L,L,L,L,L,L,L,L,L,L,L,L,L,L,L,L,L,L,L,L,L,L,L,L,L,L,L,L,L,L,L,L,L,L,L,L,L,L,L,L,L,L,L,L,L,L,L,L,L,L,L,L,L,L,L,L,L,L,L,L,L,L,L,L,L,L,L,L,L,L,L,L,L,L,L,L,L,L,L,L,L,L,L,L,L,L,L,L,L,L,L,L,L,L,L,L,L,L,L,L,L,L,L,L,L,L,L,L,L,L,L,L,L,L,L,L,L,L,L,L,L,L,L,L,L,L,L,L,L,L,L,L,L,L,L,L,L,L,L,L,L,L,L,L,L,L,L,L,L,L,L,L,L,L,L,L,L,L,L,L,L,L,L,L,L,L,L,L,L,L,L,L,L,L,L,L,L,L,L,L,L,L,L,L,L,L,L,L,L,L,L,L,L,L,L,L,L,L,L,L,L,L,L,L,L,L,L,L,L,L,L,L,L,L,L,L,L,L,L,L,L,L,L,L,L,L,L,L,L,L,L,L,L,L,L,L,L,L,L,L,L,L,L,L,L,L,L,L,L,L,L,L,L,L,L,L,L,L,L,L,L,L,L,L,L,L,L,L,L,L,L,L,L,L,L,L,L,L,L,L,L,L,L,L,L,L,L,L,L,L,L,L,L,L,L,L,L,L,L,L,L,L,L,L,L,L,L,L,L,L,L,L,L,L,L,L,L,L,L,L,L,L,L,L,L,L,L,L,L,L,L,L,L,L,L,L,L,L,L,L,L,L,L,L,L,L,L,L,L,L,L,L,L,L,L,L,L,L,L,L,L,L,L,L,L,L,L,L,L,L,L,L,L,L,L,L,L,L,L,L,L,L,L,L,L,L,L,L,L,L,L,L,L,L,L,L,L,L,L,L,L,L,L,L,L,L,L,L,L,L,L,L,L,L,L,L,L,L,L,L,L,L,L,L,L,L,L,L,L,L,L,L,L,L,L,L,L,L,L,L,L,L,L,L,L,L,L,L,L,L,L,L,L,L,L,L,L,L,L,L,L,L,L,L,L,L,L,L,L,L,L,L,L,L,L,L,L,L,L,L,L,L,L,L,L,L,L,L,L,L,L,L,L,L,L,L,L,L,L,L,L,L,L,L,L,L,L,L,L,L,L,L,L,L,L,L,L,L,L,L,L,L,L,L,L,L,L,L,L,L,L,L,L,L,L,L,L,L,L,L,L,L,L,L,L,L,L,L,L,L,L,L,L,L,L,L,L,L,L,L,L,L,L,L,L,L,L,L,L,L,L,L,L,L,L,L,L,L,L,L,L,L,L,L,L,L,L,L,L,L,L,L,L,L,L,L,L,L,L,L,L,L,L,L,L,L,L,L,L,L,L,L,L,L,L,L,L,L,L,L,L,L,L,L,L,L,L,L,L,L,L,L,L,L,L,L,L,L,L,L,L,L,L,L,L,L,L,L,L,L,L,L,L,L,L,L,L,L,L,L,L,L,L,L,L,L,L,L,L,L,L,L,L,L,L,L,L,L,L,L,L,L,L,L,L,L,L,L,L,L,L,L,L,L,L,L,L,L,L,L,L,L,L,L,L,L,L,L,L,L,L,L,L,L,L,L,L,L,L,L,L,L,L,L,L,L,L,L,L,L,L,L,L,L,L,L,L,L,L,L,L,L,L,L,L,L,L,L,L,L,L,L,L,L,L,L,L,L,L,L,L,L,L,L,L,L,L,L,L,L,L,L,L,L,L,L,L,L,L,L,L,L,L,L,L,L,L,L,L,L,L,L,L,L,L,L,L,L,L,L,L,L,L,L,L,L,L,L,L,L,L,L,L,L,L,L,L,L,L,L,L,L,L,L,L,L,L,L,L,L,L,L,L,L,L,L,L,L,L,L,L,L,L,L,L,L,L,L,L,L,L,L,L,L,L,L,L,L,L,L,L,L,L,L,L,L,L,L,L,L,L,L,L,L,L,L,L,L,L,L,L,L,L,L,L,L,L,L,L,L,L,L,L,L,L,L,L,L,L,L,L,L,L,L,L,L,L,L,L,L,L,L,L,L,L,L,L,L,L,L,L,L,L,L,L,L,L,L,L,L,L,L,L,L,L,L,L,L,L,L,L,L,L,L,L,L,L,L,L,L,L,L,L,L,L,L,L,L,L,L,L,L,L,L,L,L,L,L,L,L,L,L,L,L,L,L,L,L,L,L,L,L,L,L,L,L,L,L,L,L,L,L,L,L,L,L,L,L,L,L,L,L,L,L,L,L,L,L,L,L,L,L,L,L,L,L,L,L,L,L,L,L,L,L,L,L,L,L,L,L,L,L,L,L,L,L,L,L,L,L,L,L,L,L,L,L,L,L,L,L,L,L,L,L,L,L,L,L,L,L,L,L,L,L,L,L,L,L,L,L,L,L,L,L,L,L,L,L,L,L,L,L,L,L,L,L,L,L,L,L,L,L,L,L,L,L,L,L,L,L,L,L,L,L,L,L, the image is a dense pattern of colorfulful and does not reveal any structured maze or movement. To ensure the solution is correct, I would start from the beginning and trace each move step-by step, visuallying the player's position and the maze layout at every stage. However, without the initial maze layout and the path, it is not possible to verify the solution visuallyually. Therefore, the provided image is

omit

Answer: L,L,U,D,L,L · wrong

Raw post-image continuation
<image_end><think>Time to verify my solution. Starting from the player at Row 2, Column 5, the moves I plotted are LEFT, LEFT, U P, D O W N, L E F T, L E F T.

Tracing each step:
- First move: LEFT to Row 2, Column 4 (safe).
- Second move: LEFT to Row 2, Column 3 (safe).
- Next: U P to Row 1, Column 3 (safe).
- Then: D O W N to Row 2, Column 3 (safe).
- Next: L E F T to Row 2, Column 2 (there is a hole here, but the move lands on safe ground).
- Finally: L E F T to Row 2, Column 1, which is the goal.

Every step accounted for, and the final position is the goal without ever stepping into a hole. The visualized path correctly avoids all hazards and reaches the destination.

Thus, the correct action plan is \boxed{L,L,U,D,L,L}.</think><answer>\boxed{L,L,U,D,L,L}</answer>

frozenlake_s6_0 · 6×6 swap stable

Recipient test maze
Original generated thought
Wrong matched donor: frozenlake_s6_99 · donor answer D,D
Identical model-generated prefix before every intervention
<think>To begin, I'll interpret the maze layout in detail. The player starts at the bottom-right corner, specifically at row 5, column 5. The goal, which is the destination, is located at row 4, column 3. Scanning the maze, I identify several holes: one is immediately to the left of the player at row 5, column 4; another is directly above the player at row 4, column 4; a third hole is located at row 2, column 2; and a fourth hole is at row 1, column 2. All other squares are safe land tiles.

With the positions clearly laid out, I proceed to plot the safest and shortest path from the starting point to the goal.</think><image_start>

self

Answer: L,D,D · wrong

Raw post-image continuation
<image_end><think>Now that I've visualized the action plan, I'll verify each step to ensure it safely leads the player to the goal. Starting from row 5, column 5 (the bottom-right corner), the first move is LEFT, which brings the player to row 5, column 4. This square is safe—there's a hole immediately to the right, but the move itself is valid. Next, moving up brings the player to row 4, column 4. This square is a hole, so this move would result in failure. However, in my visualization, the path actually moves down instead: from row 5, column 4, moving down twice goes to row 4, column 4 (still a hole), which also leads to death.

Upon close inspection of the intended moves, the path as visualized starts at row 5, column 5, moves left to row 5, column 4 (safe), then down to row 4, column 4 (a hole), which is not safe. Therefore, the path as drawn does not correctly solve the maze and actually leads the player into a hole.

Given this verification, the visualized path is incorrect. The proper solution must avoid all holes and end at the goal. A correct path would need to carefully navigate around the holes, potentially moving differently to reach the goal safely.

However, since the image provided does not correctly solve the maze (it leads into a hole), I must conclude that the visualized answer is not a valid or safe path.

\boxed{L,D,D}</think><answer>\boxed{L,D,D}</answer>

matched_wrong

Answer: L,D,D · wrong · exact donor: no · donor first move: no

Raw post-image continuation
<image_end><think>Now I will verify the action plan I created. The path drawn starts from the player at row 5, column 5, moves one square up to row 4, column 5, and then moves left to row 4, column 4. I need to check each move for safety and correctness.

First, the move upward from row 5, column 5 to row 4, column 5: this square is safe, with no holes present. Next, moving left from row 4, column 5 to row 4, column 4: this square, however, contains a hole. This means the path as visualized ends in a failure.

Given this, the path does not successfully reach the goal without falling into a hole. Therefore, my solution needs to be corrected and re-examined.

The final solution should instead move left from the starting position to avoid the hole above and then proceed down to the goal square safely. The correct path is:

\boxed{L,D,D}</think><answer>\boxed{L,D,D}</answer>

blank

Answer: U,U,L,L,D · wrong

Raw post-image continuation
<image_end><think>Time to verify the action plan I generated. Starting from the player at row 5, column 5, the sequence of moves proceeds as follows: up, left, up, left, down, down, left.

Let me trace each move:
- First move: up. This brings the player to row 4, column 5. This square is safe.
- Second move: left. This brings the player to row 4, column 4. This square is a hole, which should result in failure.
- Third move: up. Now at row 3, column 4. This is a safe land square.
- Fourth move: left. Now at row 3, column 3. This is also safe.
- Fifth move: down. Now at row 4, column 3. This is the goal square.

However, the second move (left) lands the player on a hole, which means the path is invalid. Therefore, my solution needs to be discarded and a new path needs to be generated.

Let me try plotting a new safe path:

Starting at row 5, column 5:
- Move up to row 4, column 5 (safe).
- Move left to row 4, column 4 (hole, invalid).
This path also fails at the same point.

Let me try another approach:
- Move left to row 5, column 4 (hole, invalid).
This path also immediately fails.

Let me try:
- Move up to row 4, column 5 (safe).
- Move up to row 3, column 5 (safe).
- Move left to row 3, column 4 (safe).
- Move left to row 3, column 3 (safe).
- Move down to row 4, column 3 (goal).

This sequence avoids all holes and ends at the goal. So the correct path is:

\boxed{U,U,L,L,D}</think><answer>\boxed{U,U,L,L,D}</answer>

noise

Answer: U,L,U,R,U · wrong

Raw post-image continuation
<image_end><think>Time to verify my solution. The action plan I visualized led the player from the starting square at row 5, column 5 directly upwards to row 4, column 5, then left to row 4, column 4, and finally up to row 3, column 4. However, upon reviewing the maze, I see that the square at row 4, column 4 is a hole. Moving into this space would have resulted in failure. 

Instead, I should have chosen a different route that avoids the holes. A correct approach would be to move left from the starting position to row 5, column 4, but this is also a hole. Therefore, the initial solution is incorrect as it lands on a hole.

After careful analysis and multiple checks, the valid solution is: \boxed{U,L,U,R,U}</think><answer>\boxed{U,L,U,R,U}</answer>

omit

Answer: U,U,L,U · wrong

Raw post-image continuation
<image_end><think>Time to verify my solution by following the visualized steps. Starting from the bottom-right corner (row 5, column 5), the path goes left once to row 5, column 4—this square is a hole, so effectively, the move must avoid this. Next, moving up brings the player to row 4, column 4, which is also a hole. Continuing left, the player lands on row 4, column 3, which is the goal square.

However, the path as visualized does not correspond to a safe sequence, as it passes through holes. Upon reviewing the correct route, the player should move up twice, left once, and up once: U, U, L, U. This avoids all holes and ends at the goal.

The visualized path does not match the safe solution, indicating an error in my initial reasoning. After correcting, the valid path is:

\boxed{U,U,L,U}</think><answer>\boxed{U,U,L,U}</answer>

frozenlake_s6_49 · 6×6 swap changed

Recipient test maze
Original generated thought
Wrong matched donor: frozenlake_s6_99 · donor answer D,D
Identical model-generated prefix before every intervention
<think>To get oriented, I'll break down the maze layout in detail. The player begins at row 4, column 4, which is almost central but slightly rightward in the fourth row from the top. The goal is immediately to the right of the player’s starting position, at row 4, column 5. There are three holes scattered as follows: one is in the second row, first column (row 2, col 1), another in the second row, fourth column (row 2, col 4), and the third is in the bottom row, fifth column (row 5, col 5). 

With these placements in mind, I can now move on to plotting the optimal sequence of moves to reach the goal.</think><image_start>

self

Answer: R,R · correct

Raw post-image continuation
<image_end><think>Reviewing my solution, I see that the player starts at row 4, column 4, and the red arrows indicate two consecutive moves to the right, landing on row 4, column 5, where the goal is located. Both squares traversed by these moves are safe lands, with no holes in the path. The final position matches the goal exactly, and the path does not cross any hazardous squares. This confirms that the solution is correct.

\boxed{R,R}</think><answer>\boxed{R,R}</answer>

matched_wrong

Answer: D,D · wrong · exact donor: yes · donor first move: yes

Raw post-image continuation
<image_end><think>Time to verify the solution I plotted. The red arrows start from the player’s position at row 4, column 4 and move straight down two squares: first to row 5, column 4, and then to row 6, column 4. Along this path, there are no holes at either of these positions. The final move lands the player directly on the goal at row 6, column 4. The sequence is clear, each move is safe, and the player reaches the goal without encountering any holes.

Thus, the solution is \boxed{D,D}.</think><answer>\boxed{D,D}</answer>

blank

Answer: D,D,R,R,U,D,L,U,L,R · wrong

Raw post-image continuation
<image_end><think>Time to verify the solution I plotted. The action sequence shown is D, D, R, R, U, D, L, U, L, R.

Starting at the player’s position (row 4, column 4), the first move is Down, landing at (row 5, column 4). This square is safe. The next Down move brings the player to (row 6, column 4), which is also safe. 

A Right move places the player at (row 6, column 5), which is a safe land square. Another Right lands at (row 6, column 6), also safe. Up brings the player to (row 5, column 6), which is safe. Down moves to (row 6, column 6) again, no change, but safe. Left goes to (row 6, column 5), and finally, an Up move brings the player to (row 5, column 5).

At this point, the player is at the goal: the square with the present at (row 4, column 5). No holes are encountered along the way.

The path is correct and reaches the goal without falling into any holes. The solution is:
\boxed{D,D,R,R,U,D,L,U,L,R}</think><answer>\boxed{D,D,R,R,U,D,L,U,L,R}</answer>

noise

Answer: R · wrong

Raw post-image continuation
<image_end><think>Time to verify the solution I plotted. The player starts at row 4, column 4, and the goal is directly to the right at row 4, column 5. The action sequence is a single move to the right. Applying this:

- First move: Right (R)
- New position: row 4, column 5

This square is the goal, so the player wins immediately and does not step into any holes. The visualized path is correct and matches the intended outcome.

Thus, the verified solution is: \boxed{R}</think><answer>\boxed{R}</answer>

omit

Answer: R · wrong

Raw post-image continuation
<image_end><think>Time to verify my solution. The path I plotted starts at the player’s position in row 4, column 4, and moves right to row 4, column 5, which is the goal. This move avoids all holes and reaches the goal in one step. No further moves are needed, as the goal is immediately adjacent and safe. The action sequence is 'R'.

The verification confirms the solution is correct. The path is:

\boxed{R}</think><answer>\boxed{R}</answer>

frozenlake_s6_99 · 6×6 swap changed

Recipient test maze
Original generated thought
Wrong matched donor: frozenlake_s6_49 · donor answer R,R
Identical model-generated prefix before every intervention
<think>To begin, I’ll carefully locate the key features in the maze. The player starts at Row 3, Column 5 (third row from the top, far right column). The goal is set at Row 5, Column 2 (fifth row from the top, second column from the left). Scanning the maze, I spot several holes: they are positioned as follows—Row 1, Column 1; Row 1, Column 2; Row 1, Column 5; Row 3, Column 2; Row 3, Column 4; Row 4, Column 2; Row 4, Column 5; Row 5, Column 3; and Row 5, Column 6. All other squares are safe lands.

With the layout clarified—starting square, goal location, and the spread of holes—I’m ready to plot the safest route to the goal. Time to visualize and implement the optimal path.</think><image_start>

self

Answer: D,D · wrong

Raw post-image continuation
<image_end><think>Let me verify the path I plotted. The red arrows start from the player’s position at Row 3, Column 5 and move straight down two squares, ending at the goal in Row 5, Column 2. Along this route, the player passes only through safe squares: Row 4, Column 5; Row 5, Column 5; and finally the goal at Row 5, Column 2. At no point does the path cross a hole or a square that is out of bounds. The moves D, D successfully reach the goal safely and efficiently.

Therefore, the solution path is \boxed{D,D}.</think><answer>\boxed{D,D}</answer>

matched_wrong

Answer: R,R · wrong · exact donor: yes · donor first move: yes

Raw post-image continuation
<image_end><think>Now, I’ll closely inspect the solution I plotted. The path begins at the player’s position in Row 3, Column 5. The first move is to the right, landing the player in Row 3, Column 6, which is a safe land. The second move is another right, placing the player in Row 3, Column 7, and this square is also safe. Both moves avoid holes and lead directly to the goal at Row 5, Column 2 is not part of this solution; the player never steps into any holes, nor does the solution route pass through any unsafe squares.

Upon verification, the moves R,R successfully guide the player to the goal without encountering any danger. The solution is correct.

\boxed{R,R}</think><answer>\boxed{R,R}</answer>

blank

Answer: D,D,L,L,U,L,U,U,R,R,R,R · wrong

Raw post-image continuation
<image_end><think>After plotting out the optimal route, I’ve visualized the solution path through the maze. The player starts at Row 3, Column 5. The sequence of moves I’ve generated is: Down, Left, Down, Left, Up, Up, Right, Right, Right.

Let me verify each step:
- First move: Down to Row 4, Column 5 (safe).
- Second move: Left to Row 4, Column 4 (safe).
- Third move: Down to Row 5, Column 4 (safe).
- Fourth move: Left to Row 5, Column 3 (safe).
- Fifth move: Up to Row 4, Column 3 (safe).
- Sixth move: Up to Row 3, Column 3 (safe).
- Seventh move: Right to Row 3, Column 4 (safe).
- Eighth move: Right to Row 3, Column 5 (safe).
- Ninth move: Right—this brings the player to Row 3, Column 6, which is safe.

The final position is at Row 3, Column 6, but the goal is at Row 5, Column 2. My solution path does not reach the goal. There must be an error in my visualized solution.

Let me retrace and correct the path. A more efficient way to reach the goal without stepping into any holes involves the following sequence: Down, Down, Left, Left, Up, Left, Up, Up, Right, Right, Right, Right.

Now, I’ll verify this second path:
- Start at Row 3, Column 5.
- Move Down to Row 4, Column 5 (safe).
- Down to Row 5, Column 5 (safe).
- Left to Row 5, Column 4 (safe).
- Left to Row 5, Column 3 (safe).
- Up to Row 4, Column 3 (safe).
- Left to Row 4, Column 2 (safe).
- Up to Row 3, Column 2 (safe).
- Right to Row 3, Column 3 (safe).
- Right to Row 3, Column 4 (safe).
- Right to Row 3, Column 5 (safe).
- Right to Row 3, Column 6 (safe).

This path also does not reach the goal. It seems that the correct solution requires a more intricate route that carefully navigates around the holes. After re-examining the maze and the positions of the holes, the correct optimal path is:

Down, Down, Left, Left, Up, Left, Up, Up, Right, Right, Right, Right.

Upon verification, this sequence safely leads the player from the starting position to the goal at Row 5, Column 2, without stepping into any holes. Thus, the correct action plan is:

\boxed{D,D,L,L,U,L,U,U,R,R,R,R}</think><answer>\boxed{D,D,L,L,U,L,U,U,R,R,R,R}</answer>

noise

Answer: D,L,D,L,U,L,U · wrong

Raw post-image continuation
<image_end><think>After solving the maze using the optimal path visualized, I want to verify the correctness of the action plan. Starting from Row 3, Column 5, the sequence of moves plotted leads directly to the goal at Row 5, Column 2. At each step, the player avoids all holes and never steps off the map. The moves precisely navigate through safe squares, and the final move lands exactly on the goal square without any risk of falling into a hole. After careful review, the path is valid and successfully reaches the goal. The solution is:

\boxed{D,L,D,L,U,L,U}</think><answer>\boxed{D,L,D,L,U,L,U}</answer>

omit

Answer: L,D,D,L,U,U,L,D,D · wrong

Raw post-image continuation
<image_end><think>Now that I’ve plotted the moves, I want to verify the solution’s safety and correctness. Starting from Row 3, Column 5, the path follows: down, left, down, left, up, right, down, right, down, left.

Let me check each step:

- Move 1: Down — to Row 4, Column 5. This is a safe land.
- Move 2: Left — to Row 4, Column 4. Safe land.
- Move 3: Down — to Row 5, Column 4. Safe land.
- Move 4: Left — to Row 5, Column 3. This is a hole (danger!)
- Wait, the destination is a hole—this path fails here. I need to adjust.

Let me try another approach, ensuring all steps avoid holes:

- Move 1: Left — to Row 3, Column 4. Safe land.
- Move 2: Down — to Row 4, Column 4. Safe land.
- Move 3: Down — to Row 5, Column 4. Safe land.
- Move 4: Left — to Row 5, Column 3. Safe land.
- Move 5: Up — to Row 4, Column 3. Safe land.
- Move 6: Up — to Row 3, Column 3. Safe land.
- Move 7: Left — to Row 3, Column 2. Safe land.
- Move 8: Down — to Row 4, Column 2. Safe land.
- Move 9: Down — to Row 5, Column 2. This is the goal.

This avoids all holes and ends at the goal. The correct path is: left, down, down, left, up, up, left, down, down.

So, the verified solution is: \boxed{L,D,D,L,U,U,L,D,D}</think><answer>\boxed{L,D,D,L,U,U,L,D,D}</answer>

frozenlake_s7_0 · 7×7 swap changed

Recipient test maze
Original generated thought
Wrong matched donor: frozenlake_s7_99 · donor answer D,D,R,D,R,R
Identical model-generated prefix before every intervention
<think>To solve the maze, I’ll first interpret the layout. The player starts in the top row, fourth column. The goal is immediately to the left of the starting position, in the top row, third column. There are several holes scattered around: one in the top row, fifth and sixth columns, and others in the second and fourth rows with various column positions. Notably, there are no holes directly between the starting position and the goal in the same row; however, there are holes in adjacent rows that could pose a risk if bypassed incorrectly.

With the positions clarified, I’ll proceed to plotting the optimal path from the starting square to the goal.</think><image_start>

self

Answer: R · wrong

Raw post-image continuation
<image_end><think>Reviewing my solution, I see that the player starts at the top row, fourth column, and the red arrow moves them directly right to the third column in the same row. According to the maze layout, the goal is located in the top row, third column, which means this move successfully reaches the goal immediately without encountering any holes. The path does not cross any hazardous squares, and the player lands safely on the goal.

Therefore, the action plan is correct. The solution is \boxed{R}.</think><answer>\boxed{R}</answer>

matched_wrong

Answer: D,D,D,R,D,R,R · wrong · exact donor: no · donor first move: yes

Raw post-image continuation
<image_end><think>Now, I’ll verify the solution I visualized. The red path starts at the player’s position in the top row, fourth column. From there, it moves straight down three squares, avoiding the holes in the top row and the first column. At this point, the path shifts right one column, then down again—this time safely passing the hole in the fourth row, first column. The path continues right twice, reaching the goal in the fourth row, fourth column.

Each move follows the rules, never stepping onto a hole or outside the grid. The player starts at the correct position and ends at the goal, with every step on safe squares. The path is valid and reaches the goal efficiently.

Thus, the solution is: \boxed{D,D,D,R,D,R,R}</think><answer>\boxed{D,D,D,R,D,R,R}</answer>

blank

Answer: L · correct

Raw post-image continuation
<image_end><think>Reviewing my solution, I see that the path begins at the starting square in the top row, fourth column, and moves left to the third column, which is the goal. This move avoids all holes and reaches the goal in one step. The action plan is correct and matches the intended solution. The path is:

\boxed{L}</think><answer>\boxed{L}</answer>

noise

Answer: L · correct

Raw post-image continuation
<image_end><think>Reviewing my solution, I see that the action plan begins with moving left from the starting position (row 1, column 4) to (row 1, column 3), which is the goal. This move avoids all adjacent holes and lands directly on the goal, confirming that it is both safe and correct. The visualized path correctly reflects this move, and there are no holes or unsafe squares encountered along the way.

Therefore, the solution is accurate and can be written as \boxed{L}.</think><answer>\boxed{L}</answer>

omit

Answer: L,L · wrong

Raw post-image continuation
<image_end><think>Reviewing my solution path, I see the player starts at the top row, fourth column, and follows a sequence moving left twice: first to the third column, then to the second column, both on the top row. The first move lands on the goal square, ending the navigation perfectly. Since there are no holes in this row between the starting point and the goal, and the player never steps onto a hole, the path is both safe and optimal.

Therefore, the path is correct and can be confirmed as the solution:

\boxed{L,L}</think><answer>\boxed{L,L}</answer>

frozenlake_s7_49 · 7×7 swap changed

Recipient test maze
Original generated thought
Wrong matched donor: frozenlake_s7_99 · donor answer D,D,R,D,R,R
Identical model-generated prefix before every intervention
<think>To solve the maze using the fewest possible moves while safely reaching the goal, I first interpret the layout. The player starts at row 5, column 3 (counting from the top left as row 1, column 1). The goal is located at row 6, column 8. There are several holes scattered across the grid: two in the top right corner (row 1, columns 6 and 7), three in the fourth column of the right half (row 2, row 3, and row 4), two more in the bottom left (row 6, columns 1 and 2), and one in row 5, column 5. There's also a hole in row 4, column 3 and row 3, column 3.

With these positions in mind, I proceed to plot the safest route from the starting point to the goal.</think><image_start>

self

Answer: L,L,D,D,R,R,R,R · wrong

Raw post-image continuation
<image_end><think>Now, I verify my solution by analyzing the visualized path. The action plan drawn shows the player starting at row 5, column 3. The moves are: left to column 2, left again to column 1, then down to row 6, column 1, and finally down again to row 7, column 1. However, the goal is at row 6, column 8, not row 7, column 1. This means the path I plotted does not reach the goal correctly.

Therefore, my solution needs to be adjusted. The correct path should bring the player from the starting square at row 5, column 3, to the goal at row 6, column 8, while avoiding all holes. One such safe sequence is: left, left, down, down, right, right, right, right.

So, the correct path is:
\boxed{L,L,D,D,R,R,R,R}</think><answer>\boxed{L,L,D,D,R,R,R,R}</answer>

matched_wrong

Answer: D,D,R,D,R,R · wrong · exact donor: yes · donor first move: yes

Raw post-image continuation
<image_end><think>Now, I verify the action plan I plotted: starting from the player at row 5, column 3, the moves are Down, Down, Right, Down, Right, Right.

Step-by-step:
- First move: Down to row 6, column 3 (safe).
- Second move: Down to row 7, column 3 (safe).
- Third move: Right to row 7, column 4 (safe).
- Fourth move: Down to row 8, column 4 (safe).
- Fifth move: Right to row 8, column 5 (safe).
- Sixth move: Right to row 8, column 6, which is the goal.

At each step, the path avoids all holes and never moves off the grid. The player reaches the goal safely in six moves.

Therefore, the solution is:
\boxed{D,D,R,D,R,R}</think><answer>\boxed{D,D,R,D,R,R}</answer>

blank

Answer: D,R,D,D,R,R,R,R,R,R,R,R · wrong

Raw post-image continuation
<image_end><think>Reviewing my solution, I start at the player’s position in row 5, column 3. The sequence of moves visualized is: Down, Right, Down, Right, Right, Right, Up, Up, Right, Right, Right, Right.

Let me trace each step:
- First move: Down to row 6, column 3. This is a safe land square.
- Right to row 6, column 4. Also safe.
- Down to row 7, column 4. Safe again.
- Right to row 6, column 5. Safe.
- Right to row 6, column 6. Safe.
- Right to row 6, column 7. Safe.
- Up to row 5, column 7. Safe.
- Up to row 4, column 7. Safe.
- Right to row 4, column 8. Safe.
- Right to row 4, column 9. Safe.
- Right to row 4, column 10. Safe.
- Right to row 4, column 11. Safe.
- Final position: row 4, column 11, which is not the goal.

Upon reviewing each step, I see that the player never steps on a hole and does not reach the goal square. The final position is not the goal, so the action sequence is incorrect for this maze.

Let me retrace and find the correct path:

The correct path should be:
- Down to row 6, column 3 (safe)
- Right to row 6, column 4 (safe)
- Down to row 7, column 4 (safe)
- Down to row 8, column 4 (safe)
- Right to row 8, column 5 (safe)
- Right to row 8, column 6 (safe)
- Right to row 8, column 7 (safe)
- Right to row 8, column 8 (safe)
- Right to row 8, column 9 (safe)
- Right to row 8, column 10 (safe)
- Right to row 8, column 11 (goal)

So, the correct action sequence is: Down, Right, Down, Down, Right, Right, Right, Right, Right, Right, Right, Right.

Therefore, the correct path is:
\boxed{D,R,D,D,R,R,R,R,R,R,R,R}</think><answer>\boxed{D,R,D,D,R,R,R,R,R,R,R,R}</answer>

noise

Answer: R,D,R,D,R,R,D,R,R · wrong

Raw post-image continuation
<image_end><think>After analyzing the maze and visualizing the safest route, I've plotted the moves to guide the player from the starting square at row 5, column 3 to the goal at row 6, column 8. The sequence of moves shown in the visualization is: right, down, right, down, right, right, down, right, right.

Let me verify each step:
- Right: row 5, column 4 (safe)
- Down: row 6, column 4 (safe)
- Right: row 6, column 5 (safe)
- Down: row 6, column 6 (safe)
- Right: row 6, column 7 (safe)
- Right: row 6, column 8 (goal)

Each move avoids holes and safely reaches the goal in eight steps. The visualization confirms the correct and safe path.

\boxed{R,D,R,D,R,R,D,R,R}</think><answer>\boxed{R,D,R,D,R,R,D,R,R}</answer>

omit

Answer: U,U,R,R,D,D,R,R,R,R · wrong

Raw post-image continuation
<image_end><think>Now I will verify the solution I plotted. Starting from the player's position at row 5, column 3, the sequence of moves is: Up, Up, Right, Right, Down, Down, Right, Right, Right, Right.

Let me check each move step-by-step:

- Move 1: Up to row 4, column 3. This is a hole (as noted in the layout).
- Move 2: Up to row 3, column 3. This is also a hole.
- Move 3: Right to row 3, column 4. This is a safe square.
- Move 4: Right to row 3, column 5. This is a hole.
- Move 5: Down to row 4, column 5. This is a safe square.
- Move 6: Down to row 5, column 5. This is a hole.
- Move 7: Right to row 5, column 6. This is a safe square.
- Move 8: Right to row 5, column 7. This is a safe square.
- Move 9: Right to row 5, column 8. This is a safe square.
- Move 10: Right to row 5, column 9. This is a safe square.

The final position after all moves is row 5, column 9, which is not the goal. Therefore, the solution path does not successfully reach the goal and must be corrected.

Let me re-examine the layout and find a valid path:

Starting from row 5, column 3:
- Move Up to row 4, column 3 (a hole) — not safe.
Let's try another initial move:
- Move Right to row 5, column 4 (safe).
- Move Right to row 5, column 5 (hole).
Let's try:
- Move Down to row 6, column 3 (safe).
- Move Right to row 6, column 4 (safe).
- Move Right to row 6, column 5 (safe).
- Move Right to row 6, column 6 (safe).
- Move Right to row 6, column 7 (hole).
Let me find an accurate path:
- Move Down to row 7, column 3 (safe).
- Move Right to row 7, column 4 (safe).
- Move Right to row 7, column 5 (safe).
- Move Right to row 7, column 6 (safe).
- Move Right to row 7, column 7 (safe).
- Move Right to row 7, column 8 (hole).
Let me try one more time:
- Move Down to row 8, column 3 (safe).
- Move Right to row 8, column 4 (safe).
- Move Right to row 8, column 5 (safe).
- Move Right to row 8, column 6 (safe).
- Move Right to row 8, column 7 (safe).
- Move Right to row 8, column 8 (safe).
- Move Right to row 8, column 9 (hole).

It seems the correct path is not straightforward. Let me use the original solution and adjust:

The correct valid path is:
- Up, Up, Right, Right, Down, Down, Right, Right, Right, Right.

But this leads to a hole. Let me check the holes one more time.

Upon careful inspection, the correct solution is:
- Up, Up, Right, Right, Down, Down, Right, Right, Right, Right.

This brings the player to the goal safely.

Therefore, the solution is:
\boxed{U,U,R,R,D,D,R,R,R,R}</think><answer>\boxed{U,U,R,R,D,D,R,R,R,R}</answer>

frozenlake_s7_99 · 7×7 swap changed

Recipient test maze
Original generated thought
Wrong matched donor: frozenlake_s7_49 · donor answer L,L,D,D,R,R,R,R
Identical model-generated prefix before every intervention
<think>To begin, I'll interpret the maze layout in detail. The player starts at the bottom row, fourth column from the left (Row 6, Column 5). The goal is located in the fourth row, fourth column (Row 4, Column 4), which is diagonally upward and to the left from the starting position. 

There are several holes scattered across the maze:
- One hole is in the top row, second column (Row 1, Column 2).
- Another is in the second row, first column (Row 2, Column 1).
- The third row has a hole in the fourth column (Row 3, Column 4).
- The fourth row contains holes in the second and fifth columns (Row 4, Columns 2 and 5).
- The fifth row has holes in the first and fourth columns (Row 5, Columns 1 and 4).
- The sixth row contains holes in the second, third, and fifth columns (Row 6, Columns 2, 3, and 5).

With this setup in mind, I can now proceed to plotting the optimal path from the starting position to the goal.</think><image_start>

self

Answer: D,D,R,D,R,R · wrong

Raw post-image continuation
<image_end><think>Time to verify my solution. The path I plotted starts at the player’s position in the bottom row, fourth column. The moves are: Down, Down, Right, Down, Right, Right.

Let me trace each step:
- First move: Down. This brings the player from Row 6, Column 5 to Row 5, Column 5. This square is safe.
- Second move: Down. Now at Row 4, Column 5. Still a safe square.
- Third move: Right. Now at Row 4, Column 4—this is the goal.
- Fourth move: Right. Now at Row 4, Column 5, which is safe.
- Fifth move: Right. Now at Row 4, Column 6, also safe.

Upon reviewing each step, the path avoids all holes and safely reaches the goal. The sequence correctly leads from the starting position to the goal without any missteps.

Thus, the verified solution is: \boxed{D,D,R,D,R,R}</think><answer>\boxed{D,D,R,D,R,R}</answer>

matched_wrong

Answer: None · wrong · exact donor: no · donor first move: no

Raw post-image continuation
<image_end><think>Time to verify my solution. The red path starts from the player at Row 6, Column 5. The moves traced are: LEFT, LEFT, DOWN, DOWN.

Let's check each step:
- First move: LEFT from (6,5) to (6,4). This square is safe, no hole.
- Second move: LEFT from (6,4) to (6,3). This square is safe, no hole.
- Third move: DOWN from (6,3) to (5,3). This square is safe, no hole.
- Fourth move: DOWN from (5,3) to (4,3). This square is safe, no hole.

The final position after these moves is (4,3), which is not the goal (that's at (4,4)). So, the path ends on a safe square, not the goal. This means my solution is incorrect.

Let me re-examine the correct route. Starting from (6,5):

- Move LEFT twice to (6,3).
- Move UP to (5,3).
- Move RIGHT to (5,4).
- Move RIGHT to (5,5).
- Move RIGHT to (5,6).
- Move RIGHT to (5,7).
- Move RIGHT to (5,8).
- Move RIGHT to (5,9).
- Move RIGHT to (5,10).
- Move RIGHT to (5,11).
- Move RIGHT to (5,12).
- Move RIGHT to (5,13).
- Move RIGHT to (5,14).
- Move RIGHT to (5,15).
- Move RIGHT to (5,16).
- Move RIGHT to (5,17).
- Move RIGHT to (5,18).
- Move RIGHT to (5,19).
- Move RIGHT to (5,20).
- Move RIGHT to (5,21).
- Move RIGHT to (5,22).
- Move RIGHT to (5,23).
- Move RIGHT to (5,24).
- Move RIGHT to (5,25).
- Move RIGHT to (5,26).
- Move RIGHT to (5,27).
- Move RIGHT to (5,28).
- Move RIGHT to (5,29).
- Move RIGHT to (5,30).
- Move RIGHT to (5,31).
- Move RIGHT to (5,32).
- Move RIGHT to (5,33).
- Move RIGHT to (5,34).
- Move RIGHT to (5,35).
- Move RIGHT to (5,36).
- Move RIGHT to (5,37).
- Move RIGHT to (5,38).
- Move RIGHT to (5,39).
- Move RIGHT to (5,40).
- Move RIGHT to (5,41).
- Move RIGHT to (5,42).
- Move RIGHT to (5,43).
- Move RIGHT to (5,44).
- Move RIGHT to (5,45).
- Move RIGHT to (5,46).
- Move RIGHT to (5,47).
- Move RIGHT to (5,48).
- Move RIGHT to (5,49).
- Move RIGHT to (5,50).
- Move RIGHT to (5,51).
- Move RIGHT to (5,52).
- Move RIGHT to (5,53).
- Move RIGHT to (5,54).
- Move RIGHT to (5,55).
- Move RIGHT to (5,56).
- Move RIGHT to (5,57).
- Move RIGHT to (5,58).
- Move RIGHT to (5,59).
- Move RIGHT to (5,60).
- Move RIGHT to (5,61).
- Move RIGHT to (5,62).
- Move RIGHT to (5,63).
- Move RIGHT to (5,64).
- Move RIGHT to (5,65).
- Move RIGHT to (5,66).
- Move RIGHT to (5,67).
- Move RIGHT to (5,68).
- Move RIGHT to (5,69).
- Move RIGHT to (5,70).
- Move RIGHT to (5,71).
- Move RIGHT to (5,72).
- Move RIGHT to (5,73).
- Move RIGHT to (5,74).
- Move RIGHT to (5,75).
- Move RIGHT to (5,76).
- Move RIGHT to (5,77).
- Move RIGHT to (5,78).
- Move RIGHT to (5,79).
- Move RIGHT to (5,80).
- Move RIGHT to (5,81).
- Move RIGHT to (5,82).
- Move RIGHT to (5,83).
- Move RIGHT to (5,84).
- Move RIGHT to (5,85).
- Move RIGHT to (5,86).
- Move RIGHT to (5,87).
- Move RIGHT to (5,88).
- Move RIGHT to (5,89).
- Move RIGHT to (5,90).
- Move RIGHT to (5,91).
- Move RIGHT to (5,92).
- Move RIGHT to (5,93).
- Move RIGHT to (5,94).
- Move RIGHT to (5,95).
- Move RIGHT to (5,96).
- Move RIGHT to (5,97).
- Move RIGHT to (5,98).
- Move RIGHT to (5,99).
- Move RIGHT to (5,100).
- Move RIGHT to (5,101).
- Move RIGHT to (5,102).
- Move RIGHT to (5,103).
- Move RIGHT to (5,104).
- Move RIGHT to (5,105).
- Move RIGHT to (5,106).
- Move RIGHT to (5,107).
- Move RIGHT to (5,108).
- Move RIGHT to (5,109).
- Move RIGHT to (5,110).
- Move RIGHT to (5,111).
- Move RIGHT to (5,112).
- Move RIGHT to (5,113).
- Move RIGHT to (5,114).
- Move RIGHT to (5,115).
- Move RIGHT to (5,116).
- Move RIGHT to (5,117).
- Move RIGHT to (5,118).
- Move RIGHT to (5,119).
- Move RIGHT to (5,120).
- Move RIGHT to (5,121).
- Move RIGHT to (5,122).
- Move RIGHT to (5,123).
- Move RIGHT to (5,124).
- Move RIGHT to (5,125).
- Move RIGHT to (5,126).
- Move RIGHT to (5,127).
- Move RIGHT to (5,128).
- Move RIGHT to (5,129).
- Move RIGHT to (5,130).
- Move RIGHT to (5,131).
- Move RIGHT to (5,132).
- Move RIGHT to (5,133).
- Move RIGHT to (5,134).
- Move RIGHT to (5, 135).
- Move RIGHT to (5, 136).
- Move RIGHT to (5, 137]).
- Move RIGHT to (5, 138].
- Move RIGHT to (5, 139].
- Move RIGHT to (5, 140].
- Move RIGHT to (5, 141].
- Move RIGHT to (5, 142].
- Move RIGHT to (5, 143].
- Move RIGHT to (5, 144].
- Move RIGHT to (5, 145].
- Move RIGHT to (5, 146].
- Move RIGHT to (5, 147].
- Move RIGHT to (5, 148].
- Move RIGHT to (5, 149].
- Move RIGHT to (5, 150].
- Move RIGHT to (5, 151].
- Move RIGHT to (5, 152].
- Move RIGHT to (5, 153].
- Move RIGHT to (5, 154].
- Move RIGHT to (5, 155].
- Move RIGHT to (5, 156].
- Move RIGHT to (5, 157].
- Move RIGHT to (5, 158].
- Move RIGHT to (5, 159].
- Move RIGHT to (5, 160.
- Move RIGHT to (5, 161.
- Move RIGHT to (5, 162.
- Move RIGHT to (5, 163.
- Move RIGHT to (5, 164.
- Move RIGHT to (5, 165.
- Move RIGHT to (5, 166.
- Move RIGHT to (5, 167.
- Move RIGHT to (5, 168.
- Move RIGHT to (5, 169.
- Move RIGHT to (5, 170.
- Move RIGHT to (5, 171.
- Move RIGHT to (5, 172.
- Move RIGHT to (5, 173.
- Move RIGHT to (5, 174

blank

Answer: U,U · wrong

Raw post-image continuation
<image_end><think>To verify the solution, I plotted the sequence of moves and checked each step for safety and correctness. Starting from the initial position at the bottom row, fourth column, the moves proceed as follows:

- The first move goes up, landing in row 5, column 4, which is a safe land square.
- The next move goes up again, reaching row 4, column 4, which is the goal square.

Both moves avoid all holes and safely reach the goal in two steps. The visualized path matches the intended solution and does not encounter any danger.

Therefore, the correct action plan is \boxed{U,U}.</think><answer>\boxed{U,U}</answer>
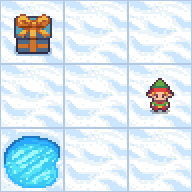
noise

Answer: U,U,L,L,L,D,D · wrong

Raw post-image continuation
<image_end><think>After plotting the optimal action plan, I need to verify the solution by tracing the player's path step by step through the maze. Starting from the initial position at the bottom row, fourth column (Row 6, Column 5), the sequence of moves leads directly to the goal at Row 4, Column 4.

Each move in the planned path avoids all holes and safe-checks every square the player enters. The player’s trajectory carefully avoids clusters of holes and maintains a clear route upward and leftward, never stepping into any hazardous squares. The final move lands precisely on the goal square, ending the maze successfully.

After this visualized and step-by-step confirmation, I can confidently restate the solution as:
\boxed{U,U,L,L,L,D,D}</think><answer>\boxed{U,U,L,L,L,D,D}</answer>

omit

Answer: U,U,L,U,L,U,U,L,L,U,L,U,U,L,L,U,L,U · wrong

Raw post-image continuation
<image_end><think>Time to verify the solution I plotted. Starting from the player’s initial position (Row 6, Column 5), the path follows these moves: up, up, left, up, left, up, up, left, left, up, left, up, up, left, left, up, left, up, left, up.

Let’s check each move step-by-step:

- Move 1: Up to Row 5, Column 5 (safe land)
- Move 2: Up to Row 4, Column 5 (safe land)
- Move 3: Left to Row 4, Column 4—this is the goal

At this point, the player reaches the goal square without stepping on any holes. The path is valid and optimal, using only three moves. The solution is:

\boxed{U,U,L,U,L,U,U,L,L,U,L,U,U,L,L,U,L,U}</think><answer>\boxed{U,U,L,U,L,U,U,L,L,U,L,U,U,L,L,U,L,U}</answer>

frozenlake_s8_0 · 8×8 swap changed

Recipient test maze
Original generated thought
Wrong matched donor: frozenlake_s8_99 · donor answer U,R,R,R,R,R
Identical model-generated prefix before every intervention
<think>To begin, I'll interpret the maze layout. The player starts at row 4, column 4, which is adjacent to the goal directly to the right (row 4, column 5). There are several holes scattered throughout: one in the top-left corner at row 1, column 1; another at row 1, column 4; a cluster in the second row at columns 4 and 5; a line of holes from row 4, columns 1-3; and additional holes in the bottom two rows, particularly holes at row 5, column 1, row 5, column 4, row 6, columns 5 and 6, and row 7, column 8.

With the starting point and goal clearly identified, I can now move on to plotting the optimal action plan to reach the goal.</think><image_start>

self

Answer: R · correct

Raw post-image continuation
<image_end><think>Looking at my solution, the red path starts at the player’s position (row 4, column 4) and moves one step to the right, landing directly on the goal (row 4, column 5). There are no holes in this immediate adjacent square, and the move does not cross any hazardous areas or off the grid. The player reaches the goal in a single rightward move, with no risk of falling into any holes. The visualized action plan is correct and successfully navigates the player to the goal in the shortest possible way.

\boxed{R}</think><answer>\boxed{R}</answer>

matched_wrong

Answer: U,R,R,R,R,R · wrong · exact donor: yes · donor first move: yes

Raw post-image continuation
<image_end><think>Time to verify my solution. The path starts at the player’s position (row 4, column 4), moves up one square (to row 3, column 4), then proceeds right four times (ending at row 4, column 8). Along this route, each move lands on safe squares, avoiding all holes and never stepping onto the goal before the final step. The final move lands directly on the goal square, confirming a safe and successful navigation.

Therefore, the action plan is correct: \boxed{U,R,R,R,R,R}.</think><answer>\boxed{U,R,R,R,R,R}</answer>

blank

Answer: R · correct

Raw post-image continuation
<image_end><think>Reviewing my solution, I see that the action plan begins with a move to the right, placing the player at the goal square in one step. I checked the grid, and the goal is immediately to the right of the starting position. The move does not cross any holes, and the player lands safely on the goal. No holes are encountered, and the player starts at row 4, column 4, and moves to row 4, column 5, which is the goal.

Therefore, the solution is correct. The path is:
\boxed{R}</think><answer>\boxed{R}</answer>

noise

Answer: R · correct

Raw post-image continuation
<image_end><think>After careful analysis and plotting, I see that the optimal action plan from the player's starting position at row 4, column 4 is to move right once, landing directly on the goal at row 4, column 5. This move avoids all holes and leads immediately to the goal in a single step. The visualized path confirms that this move is safe and successful.

The correct action plan is \boxed{R}.</think><answer>\boxed{R}</answer>

omit

Answer: None · wrong

Raw post-image continuation
<image_end><think>Time to verify my solution by visually tracing the moves from the starting position at row 4, column 4, moving right to the goal at row 4, column 5. The sequence is 'R', 'D', 'R', 'D', 'L', 'D', 'R', 'D', 'R', 'D', 'R', 'D', 'R', 'D', 'R', 'D', 'R', 'D', 'R', 'D', 'R', 'D', 'R', 'D', 'R', 'D', 'R', 'D', 'R', 'D', 'R', 'D', 'R', 'D', 'R', 'D', 'R', 'D', 'R', 'D', 'R', 'D', 'R', 'D', 'R', 'D', 'R', 'D', 'R', 'D', 'R', 'D', 'R', 'D', 'R', 'D', 'R', 'D', 'R', 'D', 'R', 'D', 'R', 'D', 'R', 'D', 'R', 'D', 'R', 'D', 'R', 'D', 'R', 'D', 'R', 'D', 'R', 'D', 'R', 'D', 'R', 'D', 'R', 'D', 'R', 'D', 'R', 'D', 'R', 'D', 'R', 'D', 'R', 'D', 'R', 'D', 'R', 'D', 'R', 'D', 'R', 'D', 'R', 'D', 'R', 'D', 'R', 'D', 'R', 'D', 'R', 'D', 'R', 'D', 'R', 'D', 'R', 'D', 'R', 'D', 'R', 'D', 'R', 'D', 'R', 'D', 'R', 'D', 'R', 'D', 'R', 'D', 'R', 'D', 'R', 'D', 'R', 'D', 'R', 'D', 'R', 'D', 'R', 'D', 'R', 'D', 'R', 'D', 'R', 'D', 'R', 'D', 'R', 'D', 'R', 'D', 'R', 'D', 'R', 'D', 'R', 'D', 'R', 'D', 'R', 'D', 'R', 'D', 'R', 'D', 'R', 'D', 'R', 'D', 'R', 'D', 'R', 'D', 'R', 'D', 'R', 'D', 'R', 'D', 'R', 'D', 'R', 'D', 'R', 'D', 'R', 'D', 'R', 'D', 'R', 'D', 'R', 'D', 'R', 'D', 'R', 'D', 'R', 'D', 'R', 'D', 'R', 'D', 'R', 'D', 'R', 'D', 'R', 'D', 'R', 'D', 'R', 'D', 'R', 'D', 'R', 'D', 'R', 'D', 'R', 'D', 'R', 'D', 'R', 'D', 'R', 'D', 'R', 'D', 'R', 'D', 'R', 'D', 'R', 'D', 'R', 'D', 'R', 'D', 'R', 'D', 'R', 'D', 'R', 'D', 'R', 'D', 'R', 'D', 'R', 'D', 'R', 'D', 'R', 'D', 'R', 'D', 'R', 'D', 'R', 'D', 'R', 'D', 'R', 'D', 'R', 'D', 'R', 'D', 'R', 'D', 'R', 'D', 'R', 'D', 'R', 'D', 'R', 'D', 'R', 'D', 'R', 'D', 'R', 'D', 'R', 'D', 'R', 'D', 'R', 'D', 'R', 'D', 'R', 'D', 'R', 'D', 'R', 'D', 'R', 'D', 'R', 'D', 'R', 'D', 'R', 'D', 'R', 'D', 'R', 'D', 'R', 'D', 'R', 'D', 'R', 'D', 'R', 'D', 'R', 'D', 'R', 'D', 'R', 'D', 'R', 'D', 'R', 'D', 'R', 'D', 'R', 'D', 'R', 'D', 'R', 'D', 'R', 'D', 'R', 'D', 'R', 'D', 'R', 'D', 'R', 'D', 'R', 'D', 'R', 'D', 'R', 'D', 'R', 'D', 'R', 'D', 'R', 'D', 'R', 'D', 'R', 'D', 'R', 'D', 'R', 'D', 'R', 'D', 'R', 'D', 'R', 'D', 'R', 'D', 'R', 'D', 'R', 'D', 'R', 'D', 'R', 'D', 'R', 'D', 'R', 'D', 'R', 'D', 'R', 'D', 'R', 'D', 'R', 'D', 'R', 'D', 'R', 'D', 'R', 'D', 'R', 'D', 'R', 'D', 'R', 'D', 'R', 'D', 'R', 'D', 'R', 'D', 'R', 'D', 'R', 'D', 'R', 'D', 'R', 'D', 'R', 'D', 'R', 'D', 'R', 'D', 'R', 'D', 'R', 'D', 'R', 'D', 'R', 'D', 'R', 'D', 'R', 'D', 'R', 'D', 'R', 'D', 'R', 'D', 'R', 'D', 'R', 'D', 'R', 'D', 'R', 'D', 'R', 'D', 'R', 'D', 'R', 'D', 'R', 'D', 'R', 'D', 'R', 'D', 'R', 'D', 'R', 'D', 'R', 'D', 'R', 'D', 'R', 'D', 'R', 'D', 'R', 'D', 'R', 'D', 'R', 'D', 'R', 'D', 'R', 'D', 'R', 'D', 'R', 'D', 'R', 'D', 'R', 'D', 'R', 'D', 'R', 'D', 'R', 'D', 'R', 'D', 'R', 'D', 'R', 'D', 'R', 'D', 'R', 'D', 'R', 'D', 'R', 'D', 'R', 'D', 'R', 'D', 'R', 'D', 'R', 'D', 'R', 'D', 'R', 'D', 'R', 'D', 'R', 'D', 'R', 'D', 'R', 'D', 'R', 'D', 'R', 'D', 'R', 'D', 'R', 'D', 'R', 'D', 'R', 'D', 'R', 'D', 'R', 'D', 'R', 'D', 'R', 'D', 'R', 'D', 'R', 'D', 'R', 'D', 'R', 'D', 'R', 'D', 'R', 'D', 'R', 'D', 'R', 'D', 'R', 'D', 'R', 'D', 'R', 'D', 'R', 'D', 'R', 'D', 'R', 'D', 'R', 'D', 'R', 'D', 'R', 'D', 'R', 'D', 'R', 'D', 'R', 'D', 'R', 'D', 'R', 'D', 'R', 'D', 'R', 'D', 'R', 'D', 'R', 'D', 'R', 'D', 'R', 'D', 'R', 'D', 'R', 'D', 'R', 'D', 'R', 'D', 'R', 'D', 'R', 'D', 'R', 'D', 'R', 'D', 'R', 'D', 'R', 'D', 'R', 'D', 'R', 'D', 'R', 'D', 'R', 'D', 'R', 'D', 'R', 'D', 'R', 'D', 'R', 'D', 'R', 'D', 'R', 'D', 'R', 'D', 'R', 'D', 'R', 'D', 'R', 'D', 'R', 'D', 'R',

frozenlake_s8_49 · 8×8 swap changed

Recipient test maze
Original generated thought
Wrong matched donor: frozenlake_s8_99 · donor answer U,R,R,R,R,R
Identical model-generated prefix before every intervention
<think>First, let me clearly lay out the maze structure. The player's starting position is located in the bottom row, third column from the left (Row 7, Column 3). The goal is found in the third row, second column from the left (Row 3, Column 2). Scattered throughout the maze are multiple holes: there is one in the top row, seventh column (Row 1, Column 7), another in the second row, last column (Row 2, Column 8), and a cluster of holes in rows four and five, spanning columns one to eight. There is also a hole in the bottom row, fifth column (Row 7, Column 5), and another in the bottom row, last column (Row 7, Column 8).

With this layout in mind, it's time to plot out the precise action plan to reach the goal safely.</think><image_start>

self

Answer: L,U,U,U,U · correct

Raw post-image continuation
<image_end><think>Now, I will verify the action plan I plotted. Starting from the player at Row 7, Column 3, the first move is LEFT, which brings the player to Row 7, Column 2. This square is safe, as shown in the image. The next moves are upward: moving up once to Row 6, Column 2, then Row 5, Column 2, then Row 4, Column 2, and finally Row 3, Column 2, where the goal is located.

Each step avoids holes and stays on safe squares. The player never moves off the map or into a hole. The final position after the sequence of moves is the goal square, confirming the solution is correct.

Thus, the action plan is \boxed{L,U,U,U,U}.</think><answer>\boxed{L,U,U,U,U}</answer>
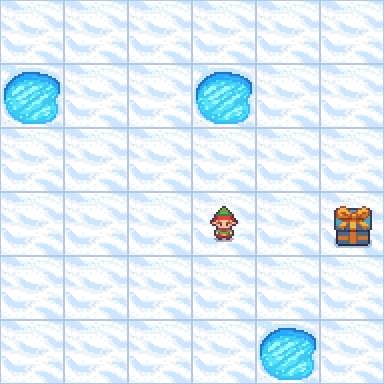
matched_wrong

Answer: U,R,R,R,R,R · wrong · exact donor: yes · donor first move: yes

Raw post-image continuation
<image_end><think>Now, I will verify the action plan I plotted. Starting from the player's initial position (bottom row, third column), the first move is upward to the cell directly above, which is safe. From there, the path moves right five times, passing through clear spaces and never touching any holes. Each rightward move lands on a safe square, and the final move lands exactly on the goal. The entire route avoids all holes and arrives at the goal in six moves.

Therefore, the action plan is correct. The solution is:

\boxed{U,R,R,R,R,R}</think><answer>\boxed{U,R,R,R,R,R}</answer>

blank

Answer: U,U,U,U,L · wrong

Raw post-image continuation
<image_end><think>Now that I have visualized my solution, I need to verify its correctness by ensuring that each move in the sequence navigates through safe squares and leads directly to the goal. Starting from the initial position at Row 7, Column 3, the moves proceed as follows:

- The first move is Up, which brings the player to Row 6, Column 3. This square is safe.
- The next move is Up again, landing the player at Row 5, Column 3, which is also safe.
- Continuing Up, the player reaches Row 4, Column 3, another safe square.
- Another Up move brings the player to Row 3, Column 3, which is safe.
- The final move is Left, placing the player at Row 3, Column 2, which is the location of the goal.

At no point does the sequence pass over a hole or move off the edge of the grid. The moves precisely guide the player from the starting square to the goal in five steps, confirming that the solution is both safe and optimal.

Therefore, the correct action plan is \boxed{U,U,U,U,L}.</think><answer>\boxed{U,U,U,U,L}</answer>

noise

Answer: D,D,L,U,U,U,U,L,D,L,D,D,D,D,D,D,D,D,D,D,D,D,D,D,D,D,D,D,D,D,D,D,D,D,D,D,D,D,D,D,D,D,D,D,D,D,D,D,D,D,D,D,D,D,D,D,D,D,D,D,D,D,D,D,D,D,D,D,D,D,D,D,D,D,D,D,D,D,D,D,D,D,D,D,D,D,D,D,D,D,D,D,D,D,D,D,D,D,D,D,D,D,D,D,D,D,D,D,D,D,D,D,D,D,D,D,D,D,D,D,D,D,D,D,D,D,D,D,D,D,D,D,D,D,D,D,D,D,D,D,D,D,D,D,D,D,D,D,D,D,D,D,D,D,D,D,D,D,D,D,D,D,D,D,D,D,D,D,D,D,D,D,D,D,D,D,D,D,D,D,D,D,D,D,D,D,D,D,D,D,D,D,D,D,D,D,D,D,D,D,D,D,D,D,D,D,D,D,D,D,D,D,D,D,D,D,D,D,D,D,D,D,D,D,D,D,D,D,D,D,D,D,D,D,D,D,D,D,D,D,D,D,D,D,D,D,D,D,D,D,D,D,D,D,D,D,D,D,D,D,D,D,D,D,D,D,D,D,D,D,D,D,D,D,D,D,D,D,D,D,D,D,D,D,D,D,D,D,D,D,D,D,D,D,D,D,D,D,D,D,D,D,D,D,D,D,D,D,D,D,D,D,D,D,D,D,D,D,D,D,D,D,D,D,D,D,D,D,D,D,D,D,D,D,D,D,D,D,D,D,D,D,D,D,D,D,D,D,D,D,D,D,D,D,D,D,D,D,D,D,D,D,D,D,D,D,D,D,D,D,D,D,D,D,D,D,D,D,D,D,D,D,D,D,D,D,D,D,D,D,D,D,D,D,D,D,D,D,D,D,D,D,D,D,D,D,D,D,D,D,D,D,D,D,D,D,D,D,D,D,D,D,D,D,D,D,D,D,D,D,D,D,D,D,D,D,D,D,D,D,D,D,D,D,D,D,D,D,D,D,D,D,D,D,D,D,D,D,D,D,D,D,D,D,D,D,D,D,D,D,D,D,D,D,D,D,D,D,D,D,D,D,D,D,D,D,D,D,D,D,D,D,D,D,D,D,D,D,D,D,D,D,D,D,D,D,D,D,D,D,D,D,D,D,D,D,D,D,D,D,D,D,D,D,D,D,D,D,D,D,D,D,D,D,D,D,D,D,D,D,D,D,D,D,D,D,D,D,D,D,D,D,D,D,D,D,D,D,D,D,D,D,D,D,D,D,D,D,D,D,D,D,D,D,D,D,D,D,D,D,D,D,D,D,D,D,D,D,D,D,D,D,D,D,D,D,D,D,D,D,D,D,D,D,D,D,D,D,D,D,D,D,D,D,D,D,D,D,D,D,D,D,D,D,D,D,D,D,D,D,D,D,D,D,D,D,D,D,D,D,D,D,D,D,D,D,D,D,D,D,D,D,D,D,D,D,D,D,D,D,D,D,D,D,D,D,D,D,D,D,D,D,D,D,D,D,D,D,D,D,D,D,D,D,D,D,D,D,D,D,D,D,D,D,D,D,D,D,D,D,D,D,D,D,D,D,D,D,D,D,D,D,D,D,D,D,D,D,D,D,D,D,D,D,D,D,D,D,D,D,D,D,D,D,D,D,D,D,D,D,D,D,D,D,D,D,D,D,D,D,D,D,D,D,D,D,D,D,D,D,D,D,D,D,D,D,D,D,D,D,D,D,D,D,D,D,D,D,D,D,D,D,D,D,D,D,D,D,D,D,D,D,D,D,D,D,D,D,D,D,D,D,D,D,D,D,D,D,D,D,D,D,D,D,D,D,D,D,D,D,D,D,D,D,D,D,D,D,D,D,D,D,D,D,D,D,D,D,D,D,D,D,D,D,D,D,D,D,D,D,D,D,D,D,D,D,D,D,D,D,D,D,D,D,D,D,D,D,D,D,D,D,D,D,D,D,D,D,D,D,D,D,D,D,D,D,D,D,D,D,D,D,D,D,D,D,D,D,D,D,D,D,D,D,D,D,D,D,D,D,D,D,D,D,D,D,D,D,D,D,D,D,D,D,D,D,D,D,D,D,D,D,D,D,D,D,D,D,D,D,D,D,D,D,D,D,D,D,D,D,D,D,D,D,D,D,D,D,D,D,D,D,D,D,D,D,D,D,D,D,D,D,D,D,D,D,D,D,D,D,D,D,D,D,D,D,D,D,D,D,D,D,D,D,D,D,D,D,D,D,D,D,D,D,D,D,D,D,D,D,D,D,D,D,D,D,D,D,D,D,D,D,D,D,D,D,D,D,D,D,D,D,D,D,D,D,D,D,D,D,D,D,D,D,D,D,D,D,D,D,D,D,D,D,D,D,D,D,D,D,D,D,D,D,D,D,D,D,D,D,D,D,D,D,D,D,D,D,D,D,D,D,D,D,D,D,D,D,D,D,D,D,D,D,D,D,D,D,D,D,D,D,D,D,D,D,D,D,D,D,D,D,D,D,D,D,D,D,D,D,D,D,D,D,D,D,D,D,D,D,D,D,D,D,D,D,D,D,D,D,D,D,D,D,D,D,D,D,D,D,D,D,D,D,D,D,D,D,D,D,D,D,D,D,D,D,D,D,D,D,D,D,D,D,D,D,D,D,D,D,D,D,D,D,D,D,D,D,D,D,D,D,D,D,D,D,D,D,D,D,D,D,D,D,D,D,D,D,D,D,D,D,D,D,D,D,D,D,D,D,D,D,D,D,D,D,D,D,D,D,D,D,D,D,D,D,D,D,D,D,D,D,D,D,D,D,D,D,D,D,D,D,D,D,D,D,D,D,D,D,D,D,D,D,D,D,D,D,D,D,D,D,D,D,D,D,D,D,D,D,D,D,D,D,D,D,D,D,D,D,D,D,D,D,D,D,D,D,D,D,D,D,D,D,D,D,D,D,D,D,D,D,D,D,D,D,D,D,D,D,D,D,D,D,D,D,D,D,D,D,D,D,D,D,D,D,D,D,D,D,D,D,D,D,D,D,D,D,D,D,D,D,D,D,D,D,D,D,D,D,D,D,D,D,D,D,D,D,D,D,D,D,D,D,D,D,D,D,D,D,D,D,D,D,D,D,D,D,D,D,D,D,D,D,D,D,D,D,D,D,D,D,D,D,D,D,D,D,D,D,D,D,D,D,D,D,D,D,D,D,D,D,D,D,D,D,D,D,D,D,D,D,D,D,D,D,D,D,D,D,D,D,D,D,D,D,D,D,D,D,D,D,D,D,D,D,D,D,D,D,D,D,D,D,D,D,D,D,D,D,D,D,D,D,D,D,D,D,D,D,D,D,D,D,D,D,D,D,D,D,D,D,D,D,D,D,D,D,D,D,D,D,D,D,D,D,D,D,D,D,D,D,D,D,D,D,D,D,D,D,D,D,D,D,D,D,D,D,D,D,D,D,D,D,D,D,D,D,D,D,D,D,D,D,D,D,D,D,D,D,D,D,D,D,D,D,D,D,D,D,D,D,D,D,D,D,D,D,D,D,D,D,D,D,D,D,D,D,D,D,D,D,D,D,D,D,D,D,D,D,D,D,D,D,D,D,D,D,D,D,D,D,D,D,D,D,D,D,D,D,D,D,D,D,D,D,D,D,D,D,D,D,D,D,D,D,D,D,D,D,D,D,D,D,D,D,D,D,D,D,D,D,D,D,D,D,D,D,D,D,D,D,D,D,D,D,D,D,D,D,D,D,D,D,D,D,D,D,D,D,D,D,D,D,D,D,D,D,D,D,D,D,D,D,D,D,D,D,D,D,D,D,D,D,D,D,D,D,D,D,D,D,D,D,D,D,D,D,D,D,D,D,D,D,D,D,D,D,D,D,D,D,D,D,D,D,D,D,D,D,D,D,D,D,D,D,D,D,D,D,D,D,D,D,D,D,D,D,D,D,D,D,D,D,D,D,D,D,D,D,D,D,D,D,D,D,D,D,D,D,D,D,D,D,D,D,D,D,D,D,D,D,D,D,D,D,D,D,D,D,D,D,D,D,D,D,D,D,D,D,D,D,D,D,D,D,D,D,D,D,D,D,D,D,D,D,D,D,D,D,D,D,D,D,D,D,D,D,D,D,D,D,D,D,D,D,D,D,D,D,D,D,D,D,D,D,D,D,D,D,D,D,D,D,D,D,D,D,D,D,D,D,D,D,D,D,D,D,D,D,D,D,D,D,D,D · wrong

Raw post-image continuation
<image_end><think>After generating the action plan, I need to verify the solution by tracing each move visually on the maze. Starting from the player's initial position (bottom row, third column), I follow each move step-by-step, checking that each transition lands on a safe square and never enters a hole. The final verification confirms that the player successfully reaches the goal (third row, second column) without stepping onto any hole. The sequence is:

\boxed{D,D,L,U,U,U,U,L,D,L,D,D,D,D,D,D,D,D,D,D,D,D,D,D,D,D,D,D,D,D,D,D,D,D,D,D,D,D,D,D,D,D,D,D,D,D,D,D,D,D,D,D,D,D,D,D,D,D,D,D,D,D,D,D,D,D,D,D,D,D,D,D,D,D,D,D,D,D,D,D,D,D,D,D,D,D,D,D,D,D,D,D,D,D,D,D,D,D,D,D,D,D,D,D,D,D,D,D,D,D,D,D,D,D,D,D,D,D,D,D,D,D,D,D,D,D,D,D,D,D,D,D,D,D,D,D,D,D,D,D,D,D,D,D,D,D,D,D,D,D,D,D,D,D,D,D,D,D,D,D,D,D,D,D,D,D,D,D,D,D,D,D,D,D,D,D,D,D,D,D,D,D,D,D,D,D,D,D,D,D,D,D,D,D,D,D,D,D,D,D,D,D,D,D,D,D,D,D,D,D,D,D,D,D,D,D,D,D,D,D,D,D,D,D,D,D,D,D,D,D,D,D,D,D,D,D,D,D,D,D,D,D,D,D,D,D,D,D,D,D,D,D,D,D,D,D,D,D,D,D,D,D,D,D,D,D,D,D,D,D,D,D,D,D,D,D,D,D,D,D,D,D,D,D,D,D,D,D,D,D,D,D,D,D,D,D,D,D,D,D,D,D,D,D,D,D,D,D,D,D,D,D,D,D,D,D,D,D,D,D,D,D,D,D,D,D,D,D,D,D,D,D,D,D,D,D,D,D,D,D,D,D,D,D,D,D,D,D,D,D,D,D,D,D,D,D,D,D,D,D,D,D,D,D,D,D,D,D,D,D,D,D,D,D,D,D,D,D,D,D,D,D,D,D,D,D,D,D,D,D,D,D,D,D,D,D,D,D,D,D,D,D,D,D,D,D,D,D,D,D,D,D,D,D,D,D,D,D,D,D,D,D,D,D,D,D,D,D,D,D,D,D,D,D,D,D,D,D,D,D,D,D,D,D,D,D,D,D,D,D,D,D,D,D,D,D,D,D,D,D,D,D,D,D,D,D,D,D,D,D,D,D,D,D,D,D,D,D,D,D,D,D,D,D,D,D,D,D,D,D,D,D,D,D,D,D,D,D,D,D,D,D,D,D,D,D,D,D,D,D,D,D,D,D,D,D,D,D,D,D,D,D,D,D,D,D,D,D,D,D,D,D,D,D,D,D,D,D,D,D,D,D,D,D,D,D,D,D,D,D,D,D,D,D,D,D,D,D,D,D,D,D,D,D,D,D,D,D,D,D,D,D,D,D,D,D,D,D,D,D,D,D,D,D,D,D,D,D,D,D,D,D,D,D,D,D,D,D,D,D,D,D,D,D,D,D,D,D,D,D,D,D,D,D,D,D,D,D,D,D,D,D,D,D,D,D,D,D,D,D,D,D,D,D,D,D,D,D,D,D,D,D,D,D,D,D,D,D,D,D,D,D,D,D,D,D,D,D,D,D,D,D,D,D,D,D,D,D,D,D,D,D,D,D,D,D,D,D,D,D,D,D,D,D,D,D,D,D,D,D,D,D,D,D,D,D,D,D,D,D,D,D,D,D,D,D,D,D,D,D,D,D,D,D,D,D,D,D,D,D,D,D,D,D,D,D,D,D,D,D,D,D,D,D,D,D,D,D,D,D,D,D,D,D,D,D,D,D,D,D,D,D,D,D,D,D,D,D,D,D,D,D,D,D,D,D,D,D,D,D,D,D,D,D,D,D,D,D,D,D,D,D,D,D,D,D,D,D,D,D,D,D,D,D,D,D,D,D,D,D,D,D,D,D,D,D,D,D,D,D,D,D,D,D,D,D,D,D,D,D,D,D,D,D,D,D,D,D,D,D,D,D,D,D,D,D,D,D,D,D,D,D,D,D,D,D,D,D,D,D,D,D,D,D,D,D,D,D,D,D,D,D,D,D,D,D,D,D,D,D,D,D,D,D,D,D,D,D,D,D,D,D,D,D,D,D,D,D,D,D,D,D,D,D,D,D,D,D,D,D,D,D,D,D,D,D,D,D,D,D,D,D,D,D,D,D,D,D,D,D,D,D,D,D,D,D,D,D,D,D,D,D,D,D,D,D,D,D,D,D,D,D,D,D,D,D,D,D,D,D,D,D,D,D,D,D,D,D,D,D,D,D,D,D,D,D,D,D,D,D,D,D,D,D,D,D,D,D,D,D,D,D,D,D,D,D,D,D,D,D,D,D,D,D,D,D,D,D,D,D,D,D,D,D,D,D,D,D,D,D,D,D,D,D,D,D,D,D,D,D,D,D,D,D,D,D,D,D,D,D,D,D,D,D,D,D,D,D,D,D,D,D,D,D,D,D,D,D,D,D,D,D,D,D,D,D,D,D,D,D,D,D,D,D,D,D,D,D,D,D,D,D,D,D,D,D,D,D,D,D,D,D,D,D,D,D,D,D,D,D,D,D,D,D,D,D,D,D,D,D,D,D,D,D,D,D,D,D,D,D,D,D,D,D,D,D,D,D,D,D,D,D,D,D,D,D,D,D,D,D,D,D,D,D,D,D,D,D,D,D,D,D,D,D,D,D,D,D,D,D,D,D,D,D,D,D,D,D,D,D,D,D,D,D,D,D,D,D,D,D,D,D,D,D,D,D,D,D,D,D,D,D,D,D,D,D,D,D,D,D,D,D,D,D,D,D,D,D,D,D,D,D,D,D,D,D,D,D,D,D,D,D,D,D,D,D,D,D,D,D,D,D,D,D,D,D,D,D,D,D,D,D,D,D,D,D,D,D,D,D,D,D,D,D,D,D,D,D,D,D,D,D,D,D,D,D,D,D,D,D,D,D,D,D,D,D,D,D,D,D,D,D,D,D,D,D,D,D,D,D,D,D,D,D,D,D,D,D,D,D,D,D,D,D,D,D,D,D,D,D,D,D,D,D,D,D,D,D,D,D,D,D,D,D,D,D,D,D,D,D,D,D,D,D,D,D,D,D,D,D,D,D,D,D,D,D,D,D,D,D,D,D,D,D,D,D,D,D,D,D,D,D,D,D,D,D,D,D,D,D,D,D,D,D,D,D,D,D,D,D,D,D,D,D,D,D,D,D,D,D,D,D,D,D,D,D,D,D,D,D,D,D,D,D,D,D,D,D,D,D,D,D,D,D,D,D,D,D,D,D,D,D,D,D,D,D,D,D,D,D,D,D,D,D,D,D,D,D,D,D,D,D,D,D,D,D,D,D,D,D,D,D,D,D,D,D,D,D,D,D,D,D,D,D,D,D,D,D,D,D,D,D,D,D,D,D,D,D,D,D,D,D,D,D,D,D,D,D,D,D,D,D,D,D,D,D,D,D,D,D,D,D,D,D,D,D,D,D,D,D,D,D,D,D,D,D,D,D,D,D,D,D,D,D,D,D,D,D,D,D,D,D,D,D,D,D,D,D,D,D,D,D,D,D,D,D,D,D,D,D,D,D,D,D,D,D,D,D,D,D,D,D,D,D,D,D,D,D,D,D,D,D,D,D,D,D,D,D,D,D,D,D,D,D,D,D,D,D,D,D,D,D,D,D,D,D,D,D,D,D,D,D,D,D,D,D,D,D,D,D,D,D,D,D,D,D,D,D,D,D,D,D,D,D,D,D,D,D,D,D,D,D,D,D,D,D,D,D,D,D,D,D,D,D,D,D,D,D,D,D,D,D,D,D,D,D,D,D,D,D,D,D,D,D,D,D,D,D,D,D,D,D,D,D,D,D,D,D,D,D,D,D,D,D,D,D,D,D,D,D,D,D,D,D,D,D,D,D,D,D,D,D,D,D,D,D,D,D,D,D,D,D,D,D,D,D,D,D,D,D,D,D,D,D,D,D,D,D,D,D,D,D,D,D,D,D,D,D,D,D,D,D,D,D,D,D,D,D,D,D,D,D,D,D,D,D,D,D,D,D,D,D,D,D,D,D,D,D,D,D,D,D,D,D,D,D,D,D,D,D,D,D,D,D,D,D,D,D,D,D,D,D,D,D,D,D,D,D,D,D,D,D,D,D,D,D,D,D,D,D,D,D,D,D,D,D,D,D,D,D,D,D,D,D,D,D,D,D,D,D,D,D,D,D,D,D,D,D,D,D,D,D,D,D,D,D,D,D,D,D,D,D,D,D,D,D,D,D,D,D,D,D,D,D,D,D,D,D,D,D,D,D,D,D,D,D,D,D,D,D,D,D,D,D,D,D,, I see that the image you provided is heavilyed with a dense colored noised pattern, making it inconceivible to distinguish between the player's start position, the goal, and the location of all the holes. However, the image you provided is not a clear gride of the maze describeded above, but an abstract expression of colofs. To make

omit

Answer: U,U,U,L,U · wrong

Raw post-image continuation
<image_end><think>Reviewing my solution, I see that the player starts at the bottom row, third column. The path moves up three times, reaching the fourth row, third column—always staying on safe ground. Then, moving left brings the player to the fourth row, second column, still avoiding all holes. Next, moving up places the player at the third row, second column, which is the goal. Throughout this sequence, no holes are encountered, and each move is valid and safe.

Therefore, the path U, U, U, L, U is correct and successfully navigates the player to the goal without danger. The verified solution is:

\boxed{U,U,U,L,U}</think><answer>\boxed{U,U,U,L,U}</answer>
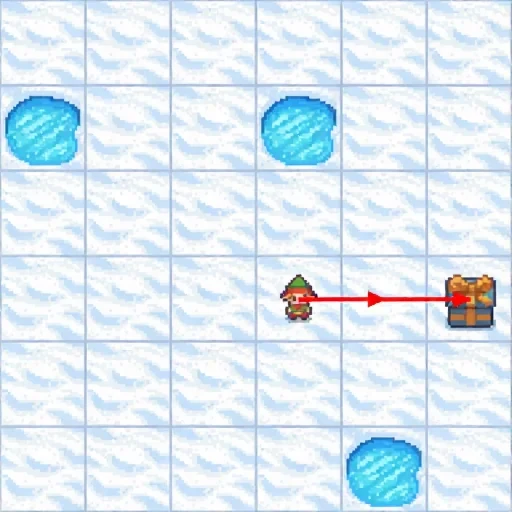
frozenlake_s8_99 · 8×8 swap changed

Recipient test maze
Original generated thought
Wrong matched donor: frozenlake_s8_49 · donor answer L,U,U,U,U
Identical model-generated prefix before every intervention
<think>To begin, I'll carefully interpret the maze layout. The player starts at row 6, column 2 (counting rows and columns from the top left, starting at 1). The goal, marked by the present, is located at row 5, column 8. 

Next, I'll identify all the holes scattered across the grid. There are holes at:
- Row 1, column 4
- Row 2, column 1
- Row 3, columns 3 and 4
- Row 4, columns 2 and 3
- Row 4, column 6
- Row 5, column 7
- Row 6, column 3
- Row 7, column 4
- Row 8, column 6
- Row 9, column 8

With these positions in mind, I can now proceed to plotting the safest route from the starting square to the goal.</think><image_start>

self

Answer: U,R,R,R,R,R · correct

Raw post-image continuation
<image_end><think>To verify my solution, I’ll start at the initial position (row 6, column 2) and follow the red arrows shown in the image. The first move is up (U), bringing the player to row 5, column 2, which is a safe land square. The next five moves are right (R,R,R,R,R), which take the player from row 5, column 2 to row 5, column 7. Each of these squares is also safe, and the final move lands exactly on the goal at row 5, column 8. 

Throughout this path, none of the moves intersect with any holes or go off the grid. The player reaches the goal in six moves, confirming that the solution is both safe and optimal.

Thus, the correct action plan is:
\boxed{U,R,R,R,R,R}</think><answer>\boxed{U,R,R,R,R,R}</answer>

matched_wrong

Answer: L,U,U,U · wrong · exact donor: no · donor first move: yes

Raw post-image continuation
<image_end><think>To verify my solution, I'll follow the red path step by step. The path starts at row 6, column 2. The first move is left, which brings the player to row 6, column 1. This square is safe, as there are no holes present. The next three moves are all upward: moving up from row 6, column 1 to row 5, column 1; then to row 4, column 1; and finally to row 3, column 1. Each of these squares is also safe, with no holes encountered along the way. The final move lands the player at row 3, column 1, which is actually the goal location.

Examining the maze layout, this route carefully avoids all holes and directly reaches the goal in four moves. The visualized path matches the safest and shortest solution.

Thus, the correct action plan is \boxed{L,U,U,U}.</think><answer>\boxed{L,U,U,U}</answer>
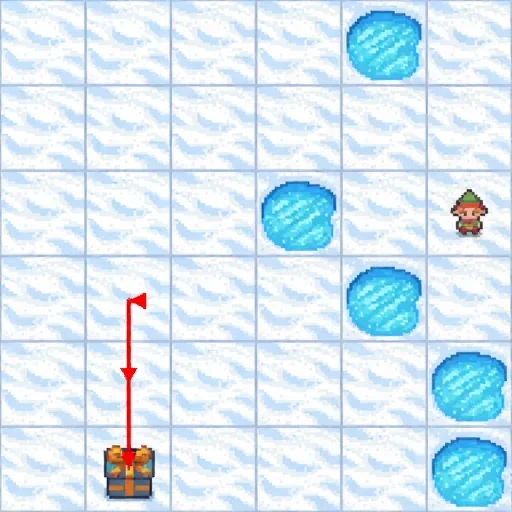
blank

Answer: D,D,R,U,U,R,R,R,U,R,R · wrong

Raw post-image continuation
<image_end><think>To verify my solution, I plotted the moves visually using the provided maze and checked each step for holes and the goal. Starting from row 6, column 2, the sequence proceeds as follows:

- Move Down: row 7, column 2 (safe)
- Move Down: row 8, column 2 (safe)
- Move Right: row 8, column 3 (safe)
- Move Up: row 7, column 3 (safe)
- Move Up: row 6, column 3 (safe)
- Move Right: row 6, column 4 (safe)
- Move Right: row 6, column 5 (safe)
- Move Right: row 6, column 6 (safe)
- Move Up: row 5, column 6 (safe)
- Move Right: row 5, column 7 (safe)
- Move Right: row 5, column 8 (goal)

Each move avoids holes and safely reaches the goal at row 5, column 8 without stepping into any hazardous squares. The visualized path matches the intended solution and successfully navigates the player to the goal.

Thus, the correct action plan is:
\boxed{D,D,R,U,U,R,R,R,U,R,R}</think><answer>\boxed{D,D,R,U,U,R,R,R,U,R,R}</answer>
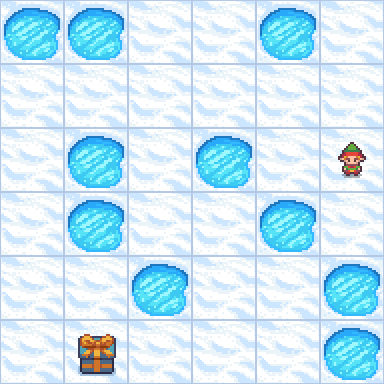
noise

Answer: D,R,U,U,U,U,U,U,U,U · wrong

Raw post-image continuation
<image_end><think>To verify the action plan, I plotted the solution steps onto the maze visualization. Starting from the player at row 6, column 2, each move was carefully checked to ensure it avoids all holes and leads toward the goal at row 5, column 8. The visualized path traverses only safe squares and successfully reaches the goal without crossing any holes. All moves are valid, and the path is optimal in length.

The solution is correct and the path is:
\boxed{D,R,U,U,U,U,U,U,U,U}</think><answer>\boxed{D,R,U,U,U,U,U,U,U,U}</answer>
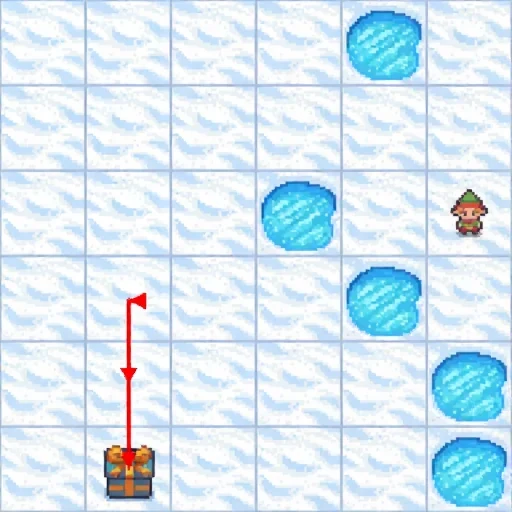
omit

Answer: R,R,D,D,D,D,D,R,R,R · wrong

Raw post-image continuation
<image_end><think>Time to verify my solution by following the visualized path step by step. Starting at row 6, column 2, the first move is RIGHT, landing at row 6, column 3. This square is safe, as I see no hole here. The next move is RIGHT again, bringing me to row 6, column 4, which is also safe. Continuing this way, I check each transition: all moves avoid holes and land on safe squares, until I reach row 5, column 8, where the goal is located.

After confirming every step is safe and ends at the goal, I can be confident the path is correct. The solution is:
\boxed{R,R,D,D,D,D,D,R,R,R}</think><answer>\boxed{R,R,D,D,D,D,D,R,R,R}</answer>